
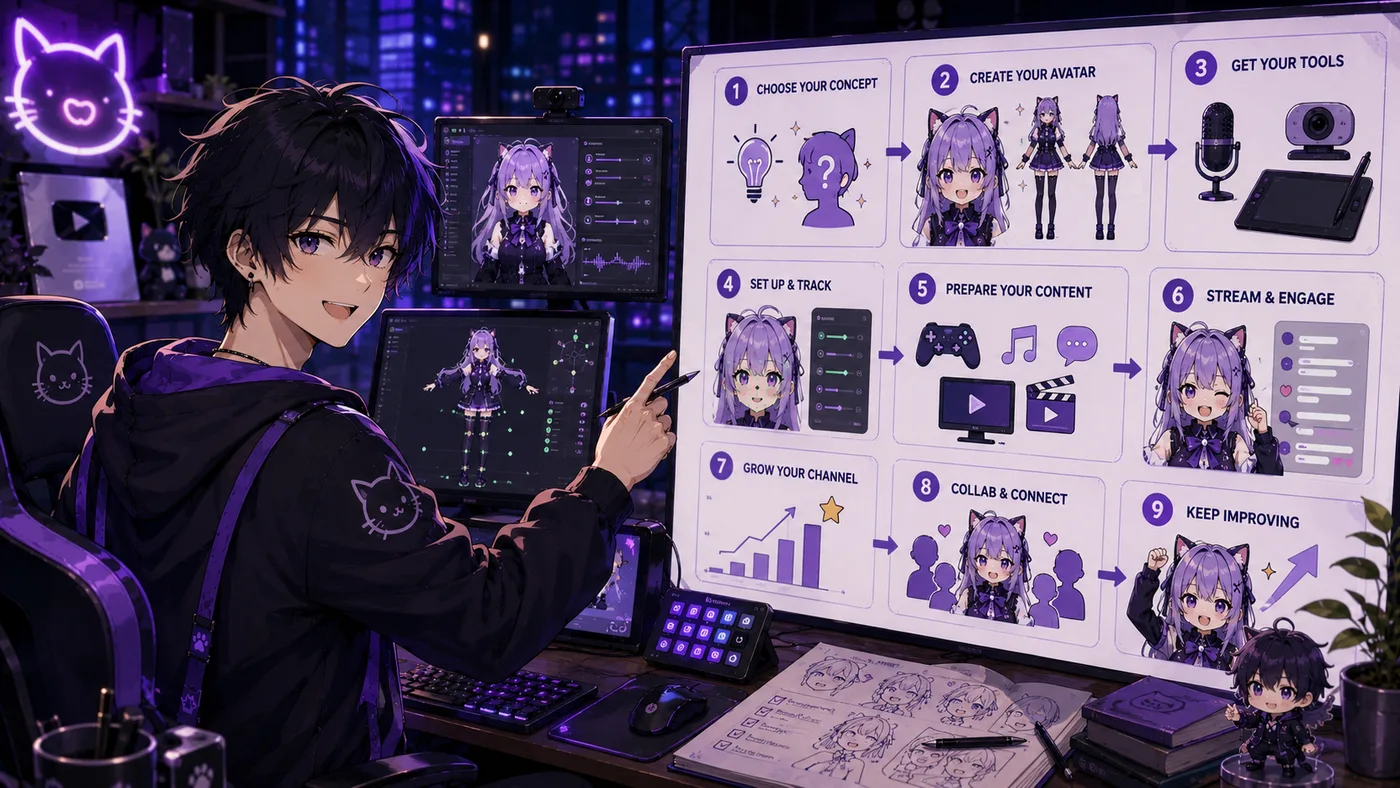
Becoming a VTuber is less mysterious than it looks on stage. You design a character, put that character on a model that can move, track your face (and maybe your body), and then do the same work every streamer does: show up, talk to people, and publish on a schedule.
You do not need an agency, a 3D concert rig, or a perfect voice. You need a persona people can recognize, audio that is not painful, and enough consistency that chat knows when you will be back. If the word itself is still fuzzy, start with what a VTuber is and the term wiki.
1. Define the character, not just the look
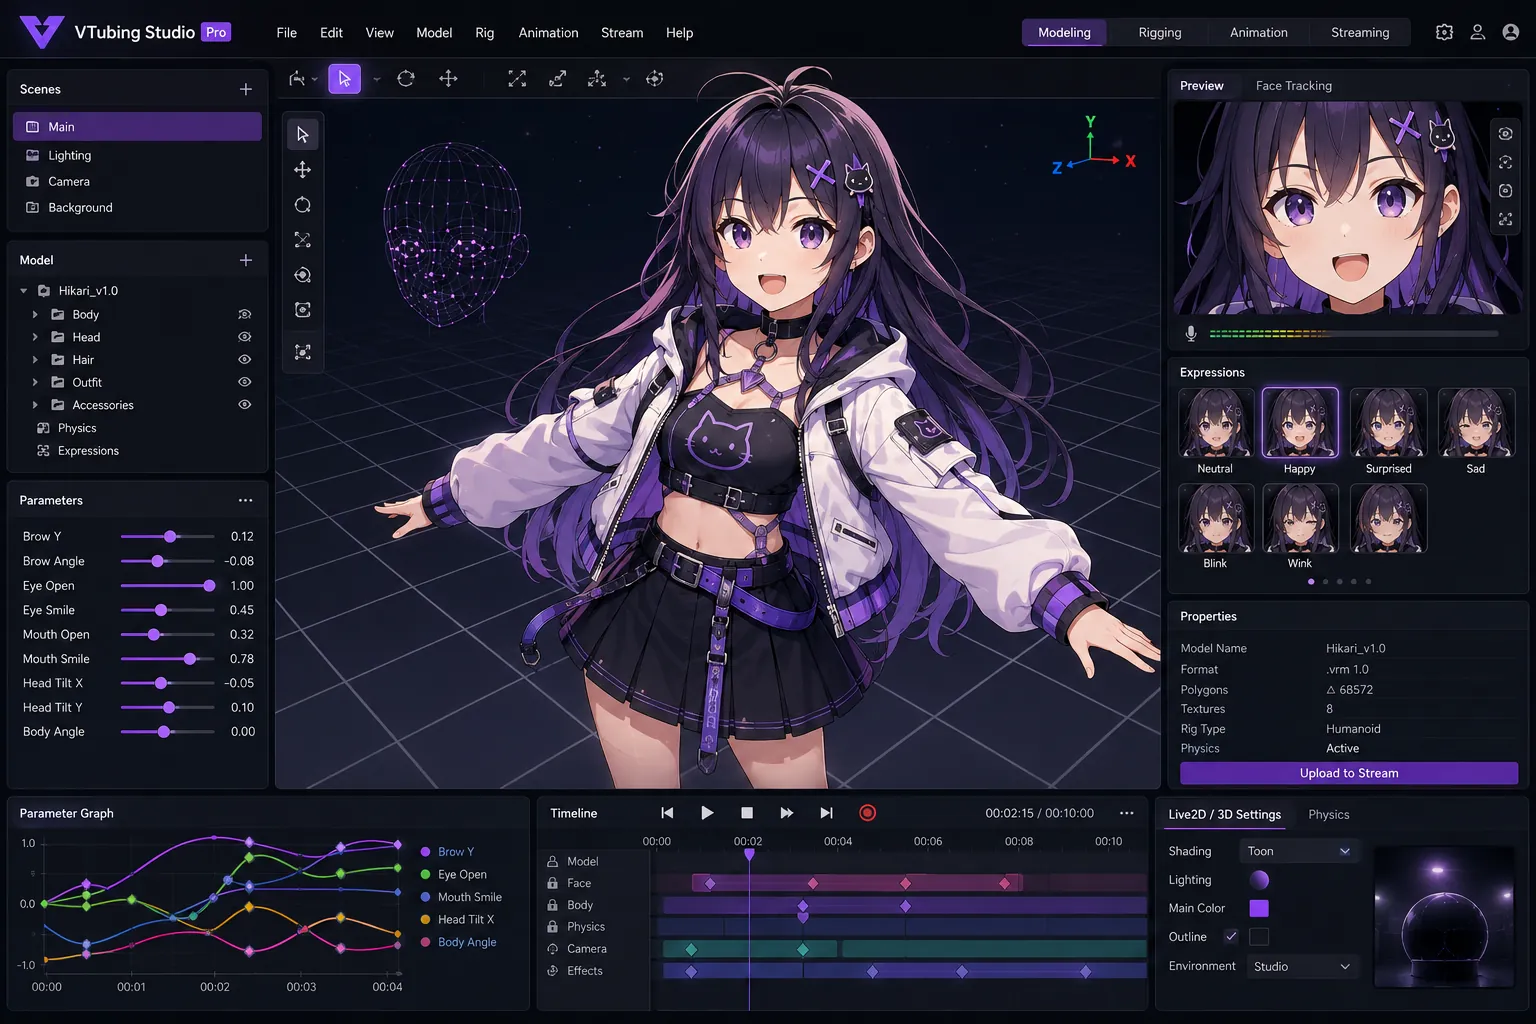
Write the character before you pay for art. Note the name, pronouns, species or vibe, voice tone, and what the stream is about on a normal day. A shark girl who only plays horror, a tired office mage who reviews tools, and a chaotic cooking fox need different models, overlays, and thumbnails.
Keep the design readable at facecam size: a clear silhouette, a limited color palette, and one or two signature details (a hair clip, a tail, a hoodie graphic). If nobody can describe you in one sentence, the model will not save the brand. Copying an agency talent’s design language so closely that you look like fan art of them is the same failure with nicer brushes.
Lore can stay light. A paragraph is enough for debut. You can add history later; you cannot easily rebuild a muddy first impression. Do not buy a model before the content and voice are clear enough to brief—that purchase will not invent the show for you.
Choose or create your first avatar
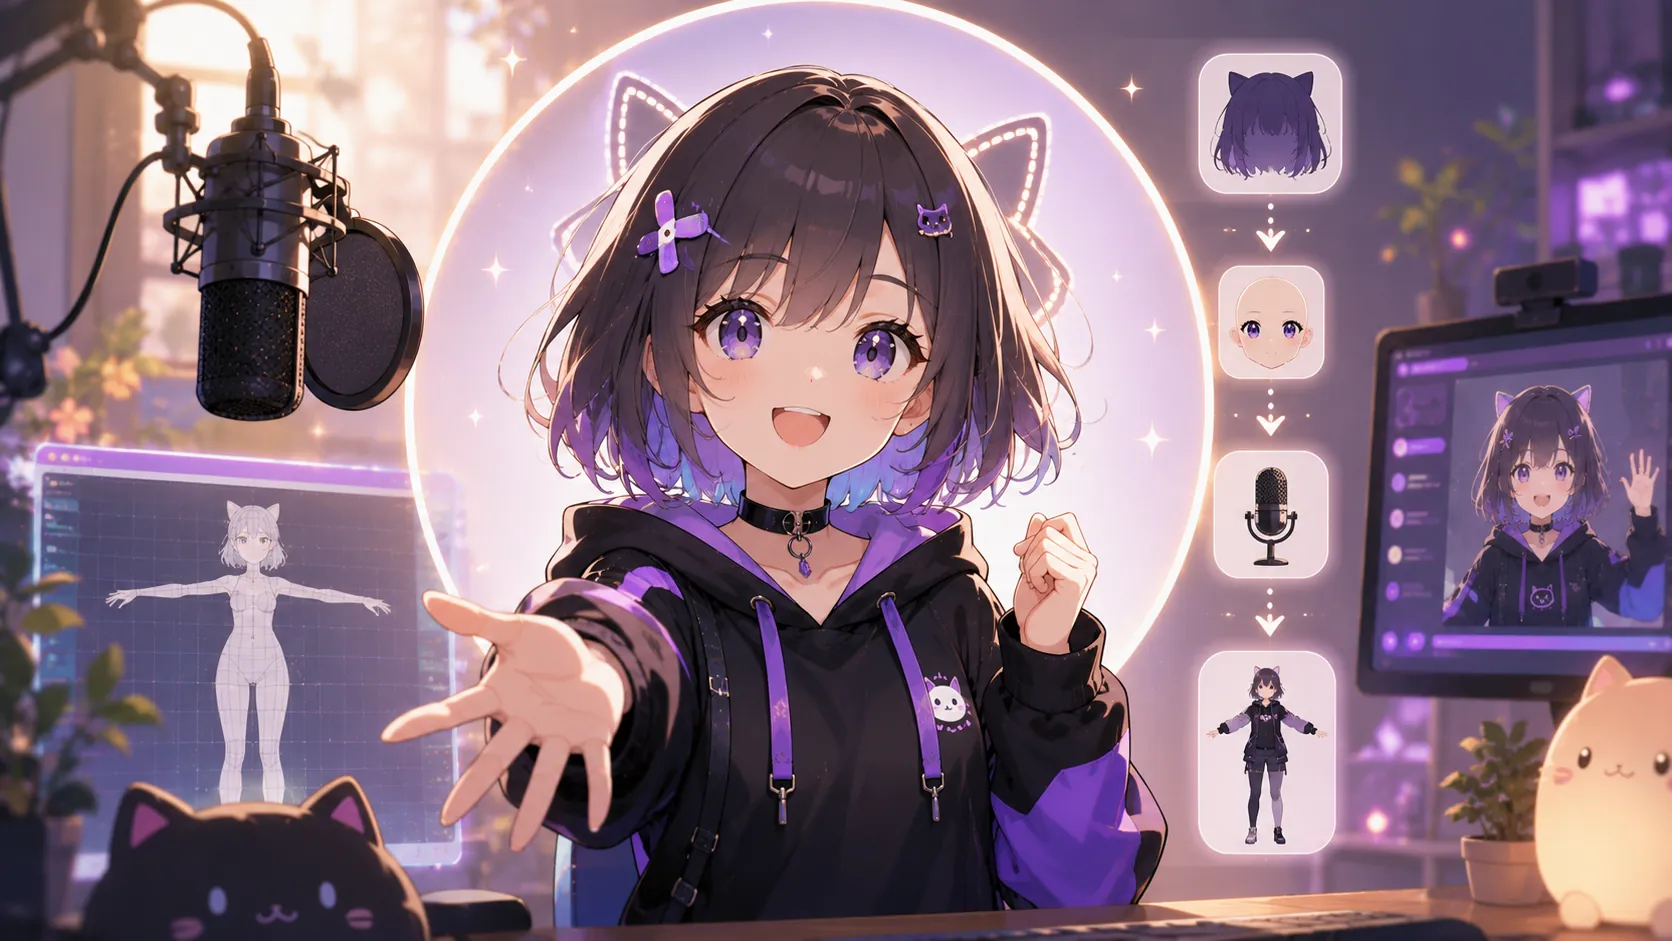
You do not need to draw or model to get a file that can stream.
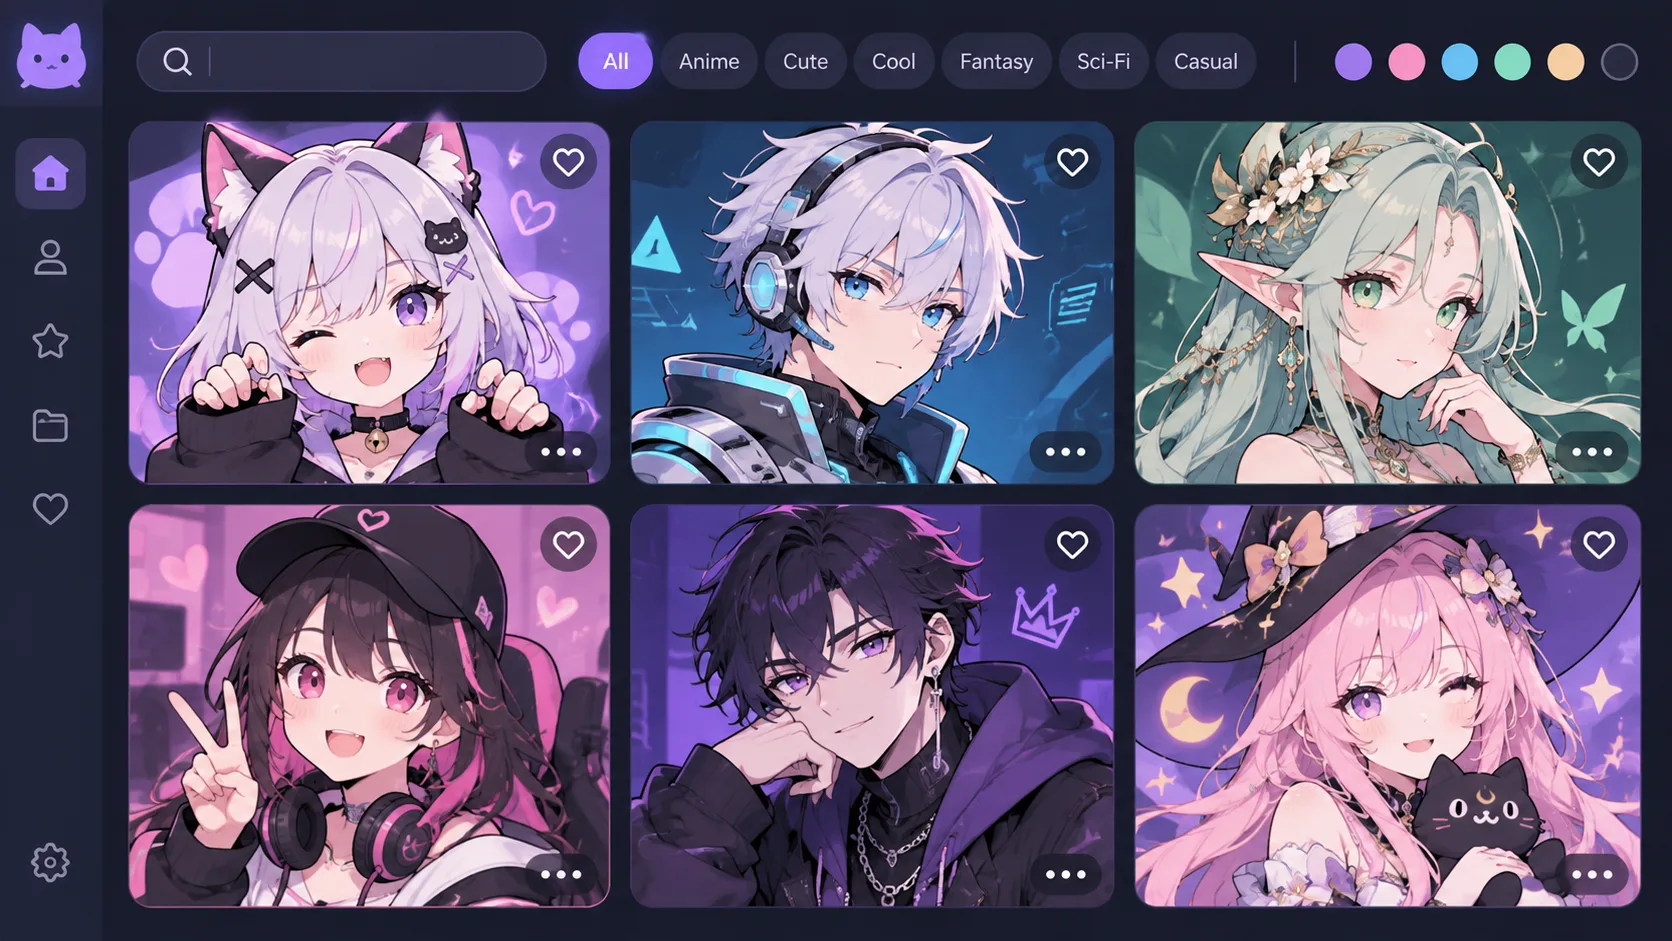
Route A — free base (fastest first stream): pick a trusted free source with CC0 or clear commercial permissions. Shortlist three candidates. For each, check that the face stays readable at phone size, that mouth and eyes exist as separate layers (Live2D) or clear mouth states (PNGTuber), and that the license allows tips/subs if you plan to monetize. Customize hair or eyes lightly; stop when the silhouette stays clean.
Route B — VRoid or commission: VRoid (free) builds a simple humanoid and exports VRM with minimal accessories for the first file. For a commission, send a short brief—references if you have them, commercial-use requirement, and a hard deadline—and wait until the file is in your hands before you obsess over fine rig details.
720p readability test: shrink the preview to a small window or phone. If eyelashes, pins, or floating charms turn into noise, simplify or pick another model. Chat sees you at thumbnail size long before full resolution.
License checklist:
- You can name the license (CC0, paid commercial, etc.)
- Monetized streams are allowed, or you will stream without tips/subs until you switch models
- Credit requirements (if any) are noted for your about panel
- You did not grab a “free” file from a random Discord with no terms
Leave this step with one avatar decision—not three open tabs.
2. Choose a model you can actually ship
Pick the lowest-tech avatar that still feels like you, then upgrade.
- PNGTuber / PNGTuberPlus: two or more images that swap when you talk. Fastest path to a first stream.
- Premade Live2D: cheaper and faster than a full commission. You get less uniqueness.
- Commissioned Live2D: the standard indie look. Budget separately for the illustration and the rigger.
- 3D: worth it if you want full-body movement, VR, or 3D collabs. It costs more and needs a stronger PC.
Ask artists for a commercial-use license in writing. You will need it for merch, clips, and platform monetization. Ignoring a personal-use file is a dead end: you cannot legally sell merch or monetize on that license.
Pick a path you can finish this week
There are three main technical paths. Picking the wrong first one is a common reason people quit in week one.
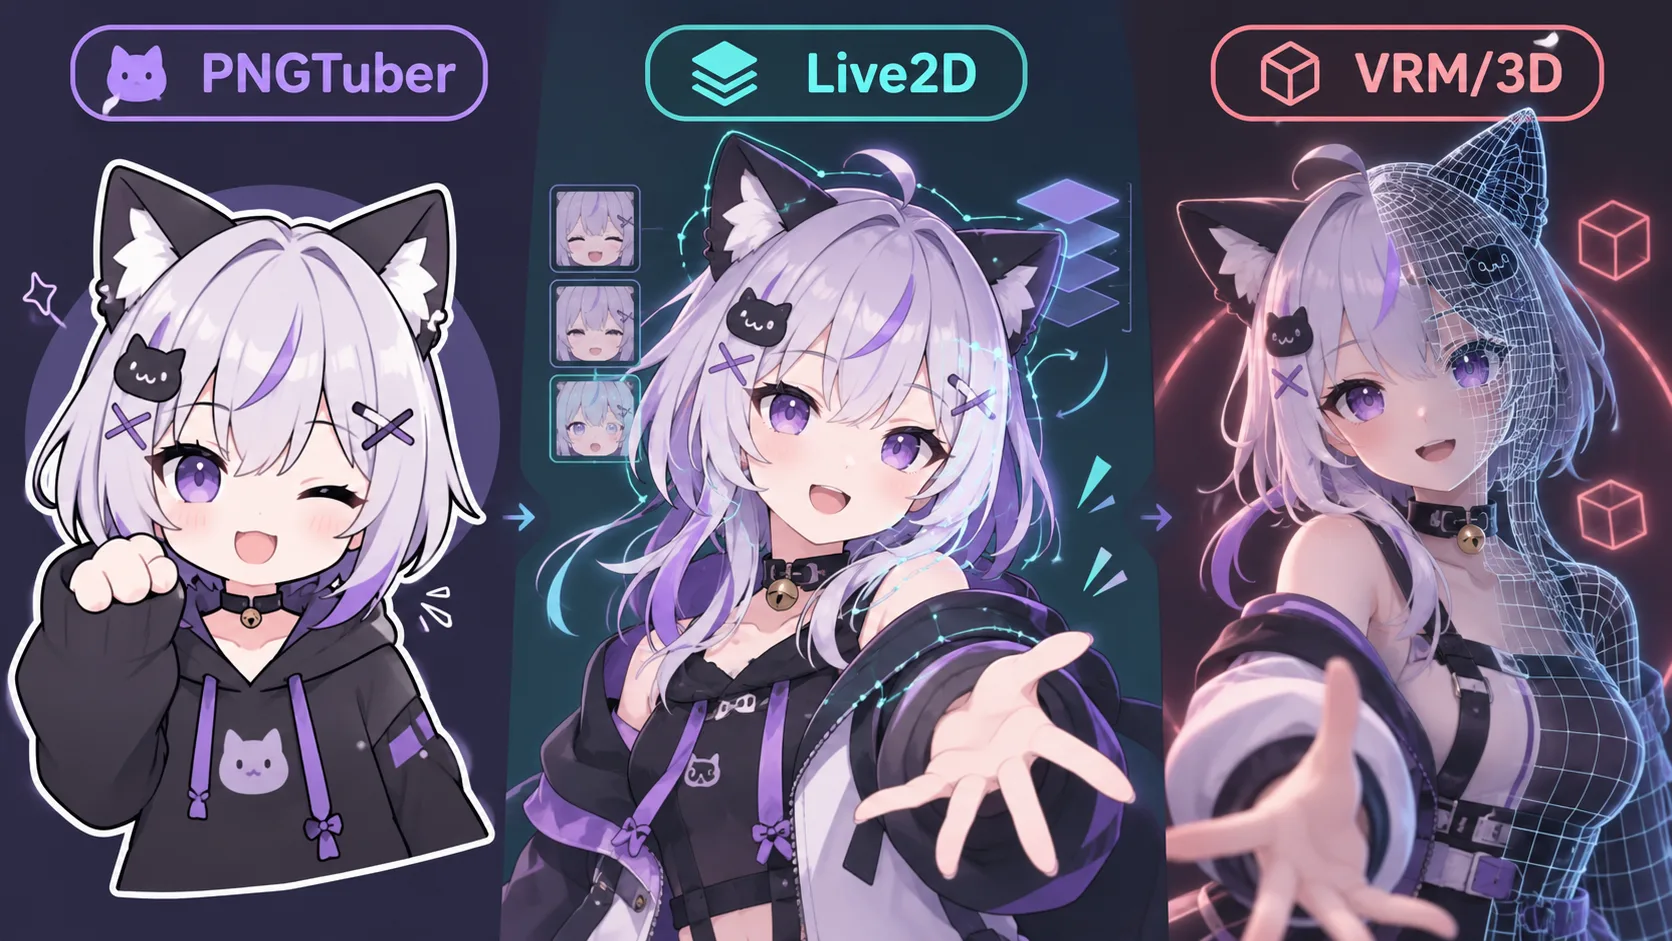
| PNGTuber | Live2D | VRM / 3D | |
|---|---|---|---|
| Time to first stream | Same day | A few days to a week | Often weeks |
| Needs webcam tracking | No (audio or manual swap) | Yes | Yes |
| Looks “alive” on camera | Basic, but clear | Strong at 720p/1080p | Strong, plus body turns |
| Collabs / full turns | Limited | Limited | Best fit |
| Typical first-week cost | Free or cheap art | Free base or commission | Free VRoid or paid model |
You are not choosing your forever format. You are choosing what lets you go live this week. If you have never streamed, start as a PNGTuber or with a simple Live2D—nobody needs a complex 3D model for stream one.
Match hours to a path: ~1 day → PNGTuber; 3–7 days → simple Live2D; 2+ weeks free and you already stream → VRM is fine, otherwise park it. Write the choice in one line (for example: Live2D this week — VRM later) and use it as a filter for every download and commission offer.
Your first overlay (keep it tiny)
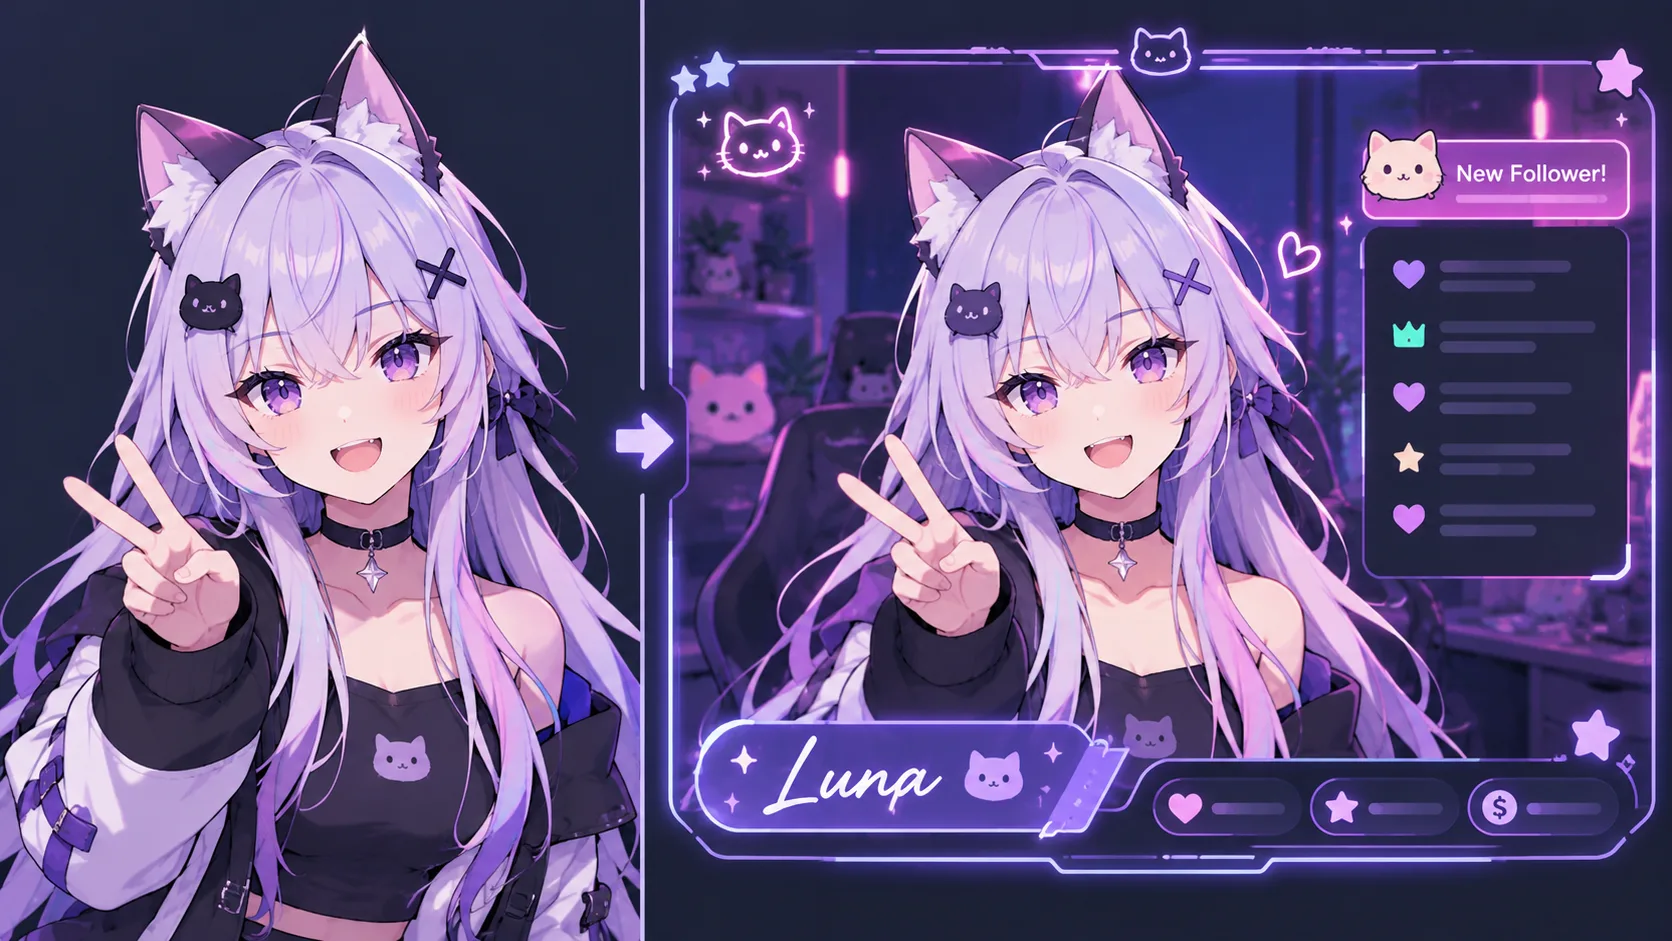
An overlay is the layer on top—frame, name, maybe a “starting soon” panel. It should feel like one show with the model, not two products glued together. For deeper layout and chat chrome, see the Twitch overlays with chat guide.
Keep v1 to frame + name. Skip animated alerts until you have survived one live. Overbuilding overlays, alerts, and lore while underbuilding the actual show is how debuts stall with nothing to watch.
- Pull 2–3 colors from the avatar (hair, accent, outfit) and reuse those hex values.
- Name text must read at 720p; if you squint in the OBS preview, enlarge it.
- Never cover the mouth or eyes.
- No alert spam and no animated border for the first version.
In OBS, add a Browser Source (HTML overlay URL) or an Image source (PNG), stack it above the avatar, lock it when aligned, and record 15 seconds to confirm the face stays clear.
Overlays with their own identity
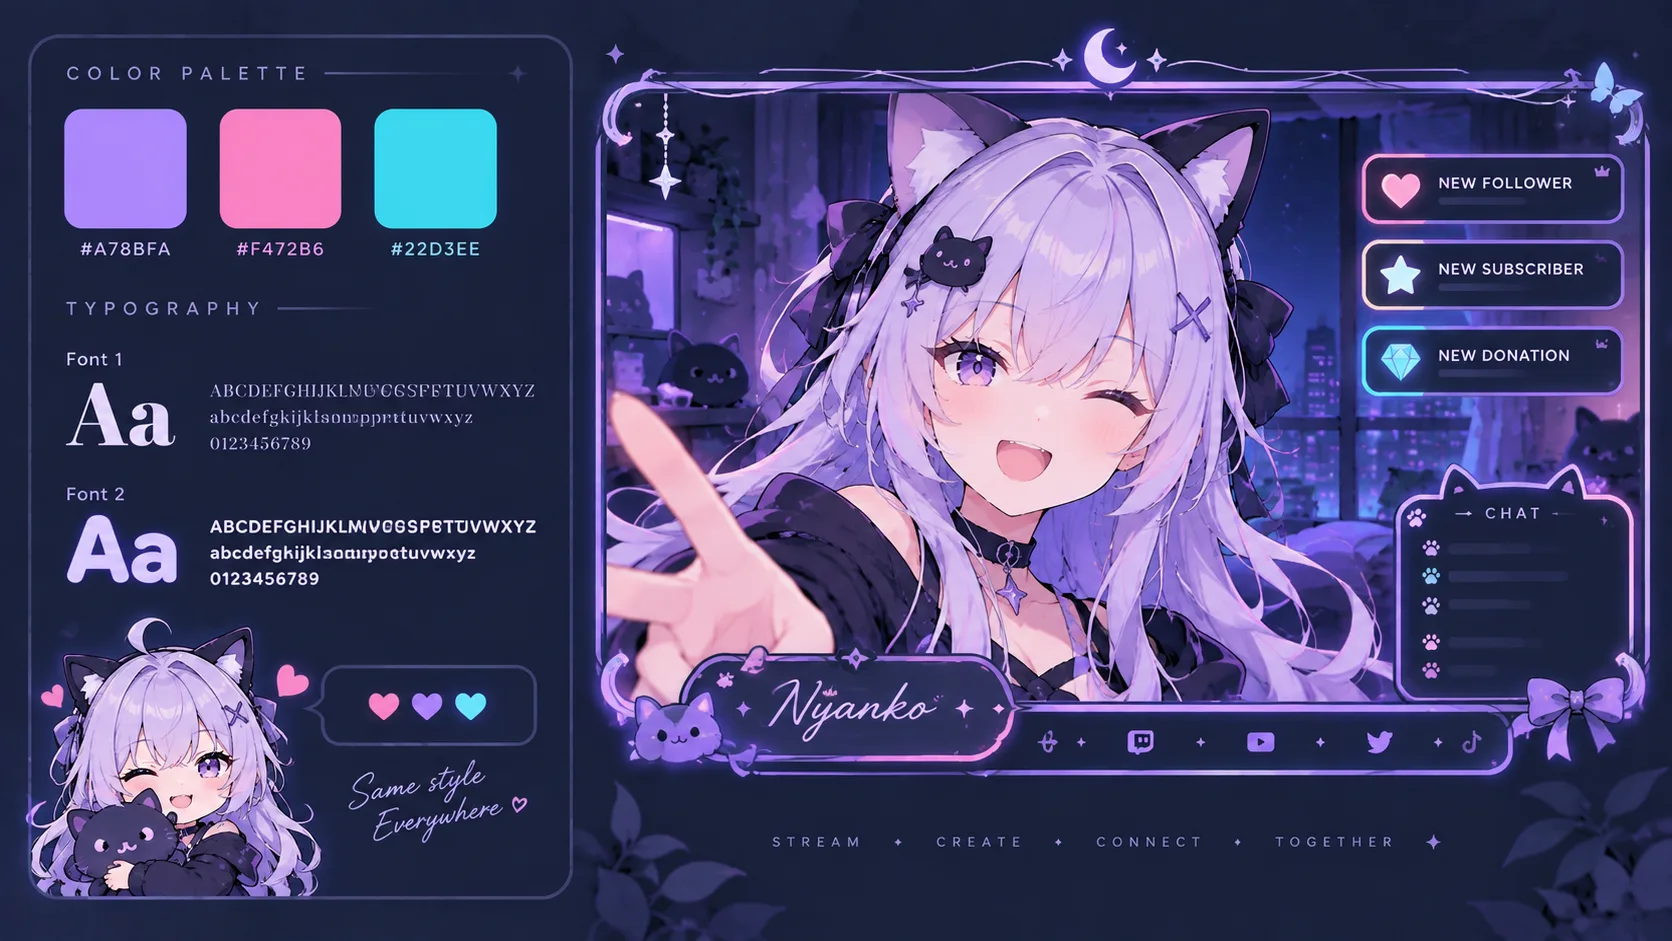
When you redesign past v1, keep at most two fonts—one for titles, one for alert text. Sample the same 2–3 hex colors from the avatar (hair, accent, outfit) plus black/white. Mute the stream and watch five seconds of preview: if the eye lands on the alert box before the face, shrink, desaturate, or shorten the animation. Avatar leads; chrome follows.
3. Set up tracking and broadcast software
For Live2D, VTube Studio is the common hub: it receives tracking, plays expression hotkeys, and outputs a transparent avatar you capture in OBS Studio. PRISM Live Studio is an alternative that bundles more of the streaming stack. For 3D, VSeeFace and Warudo are typical starting points. The full comparison is in the VTuber software guide.
Tracking quality depends more on lighting and a stable camera than on buying a new GPU. A phone with good face tracking, or a webcam at eye level with light on your face, beats a dark room with an expensive camera.
Map a few expressions you will actually use: a laugh, a shock toggle, a tiny rage. Ten unused hotkeys help nobody during a boss fight.
Install and configure your tracking app
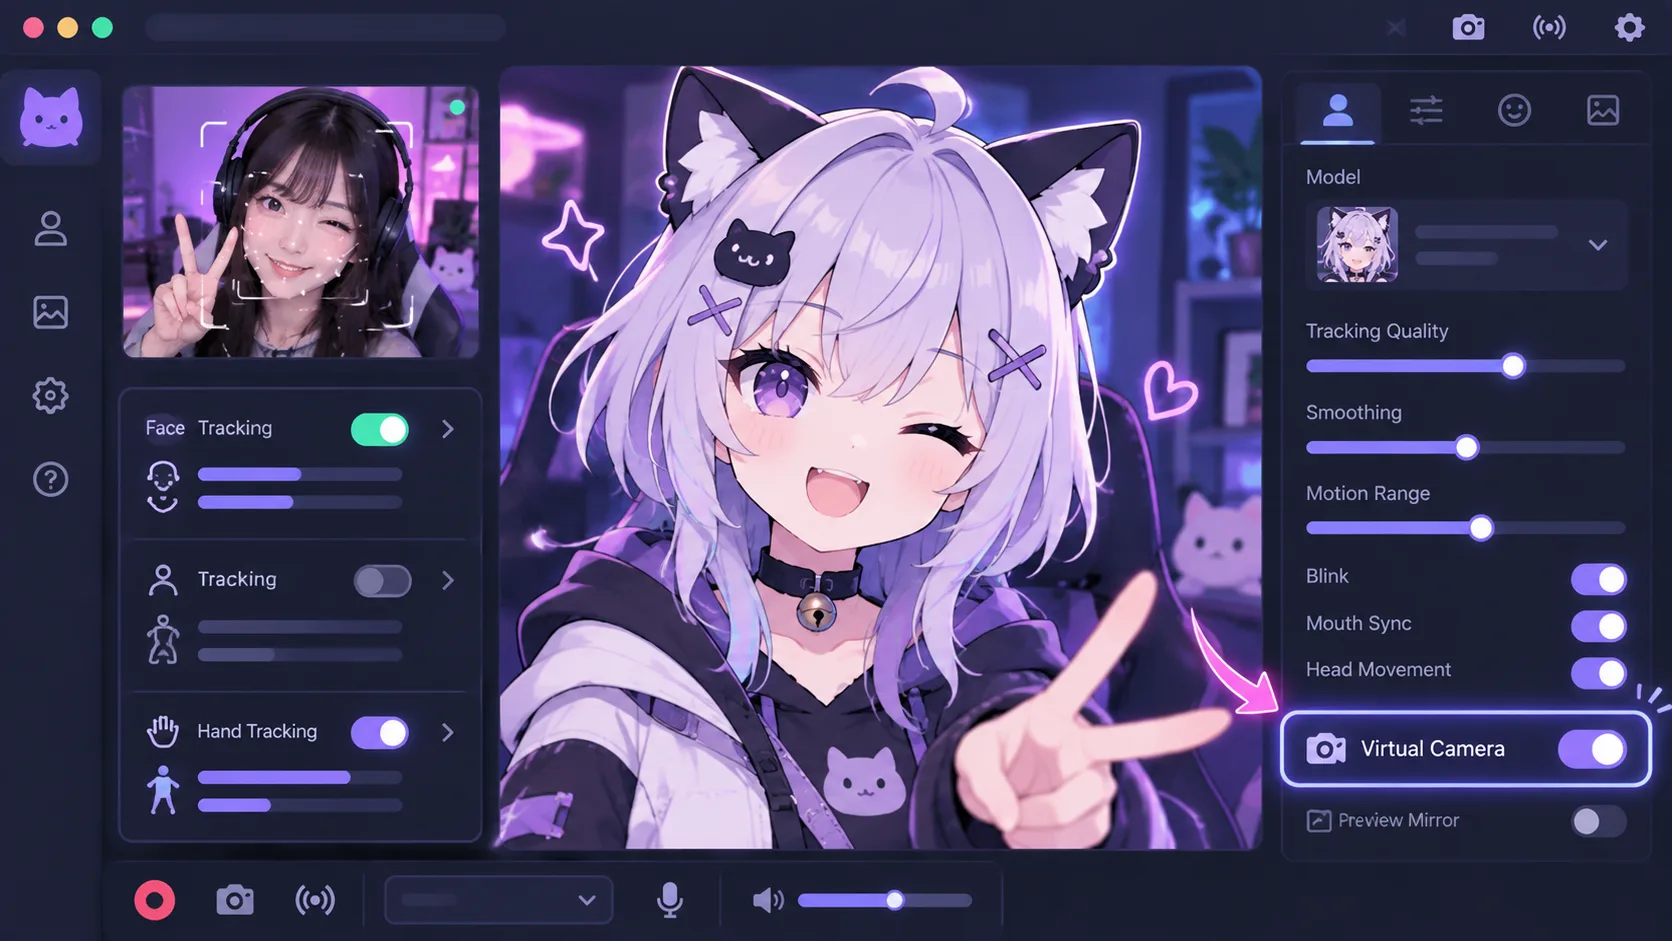
Match the app to the file type: Live2D → VTube Studio; VRM → VSeeFace (or another VRM tracker). Load the model and confirm mouth and blink move on the sliders before you turn the camera on. Calibrate from a true neutral face, enable the virtual camera, then fix lighting before chasing sensitivity. If tracking shakes, raise smoothing; if it loses the face, fix light first.
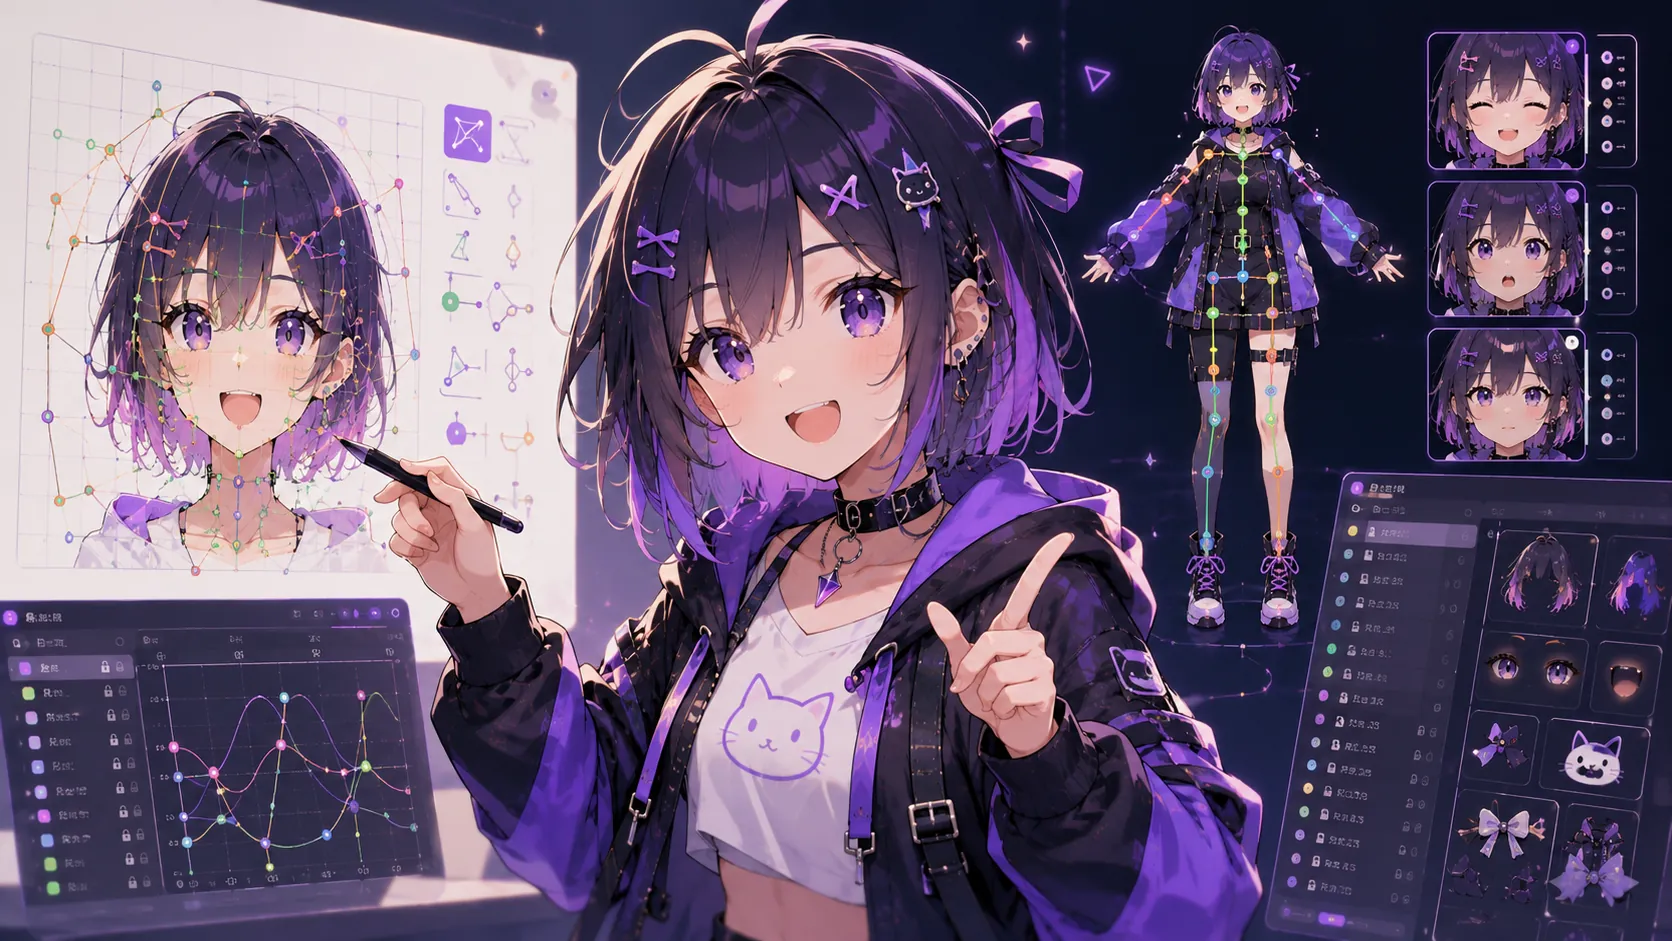
Mouth-flap that does not look like a trapdoor
If you rig yourself—or brief a rigger—mouth-flap is the first thing chat notices. For costs, Cubism vs 3D, and commissioning, see VTuber rigging.
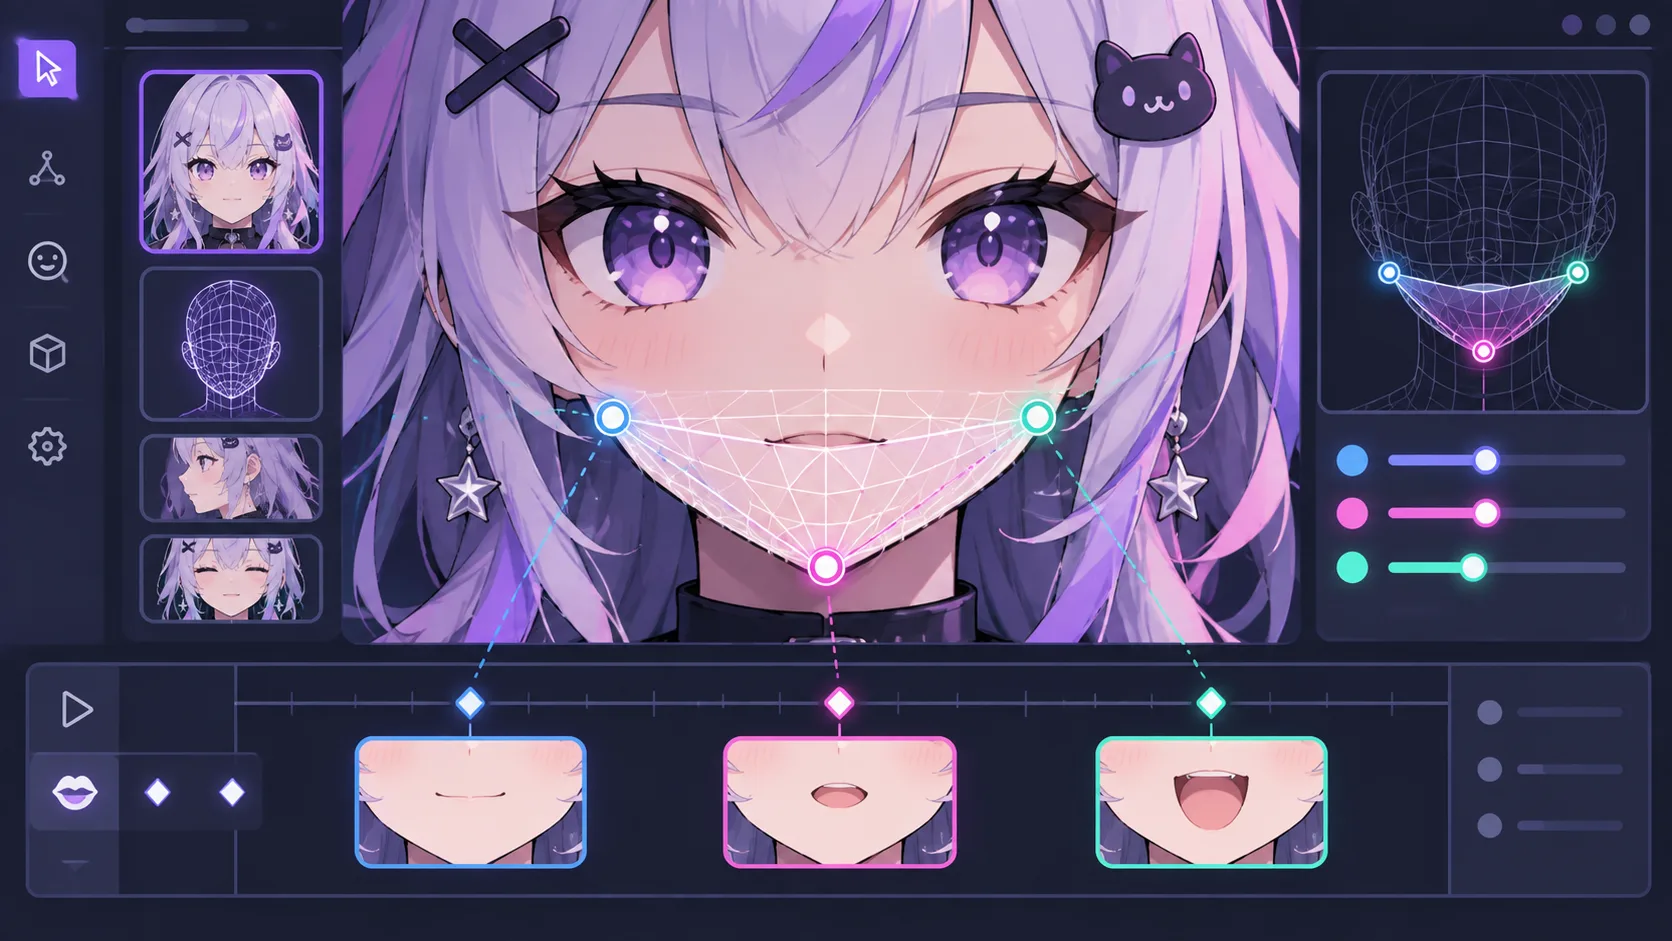
Bind ParamMouthOpenY (or your tracker’s mouth parameter) to the jaw deformer so it translates down from 0 to 1—not a rotating trapdoor. Bind inner-mouth art to scale open. Hide teeth and tongue until about 30% open so idle does not clip.
Use at least three anchors: chin center, left corner, right corner. Keyforms at 0, 0.5, and 1 are enough for a first model; the mid key stops the lip from teleporting.
| What you see | Likely cause | What to try |
|---|---|---|
| Trapdoor jaw | Rotation instead of translate | Rebind deformer to move down |
| Rectangle mouth | Corners too close to center | Widen left/right anchors |
| Cheek collapse | Coarse mesh around the mouth | Add vertices, re-bind |
| Teeth always visible | Visibility not gated | Hide until ~30% open |
Eyes and blink that stay alive
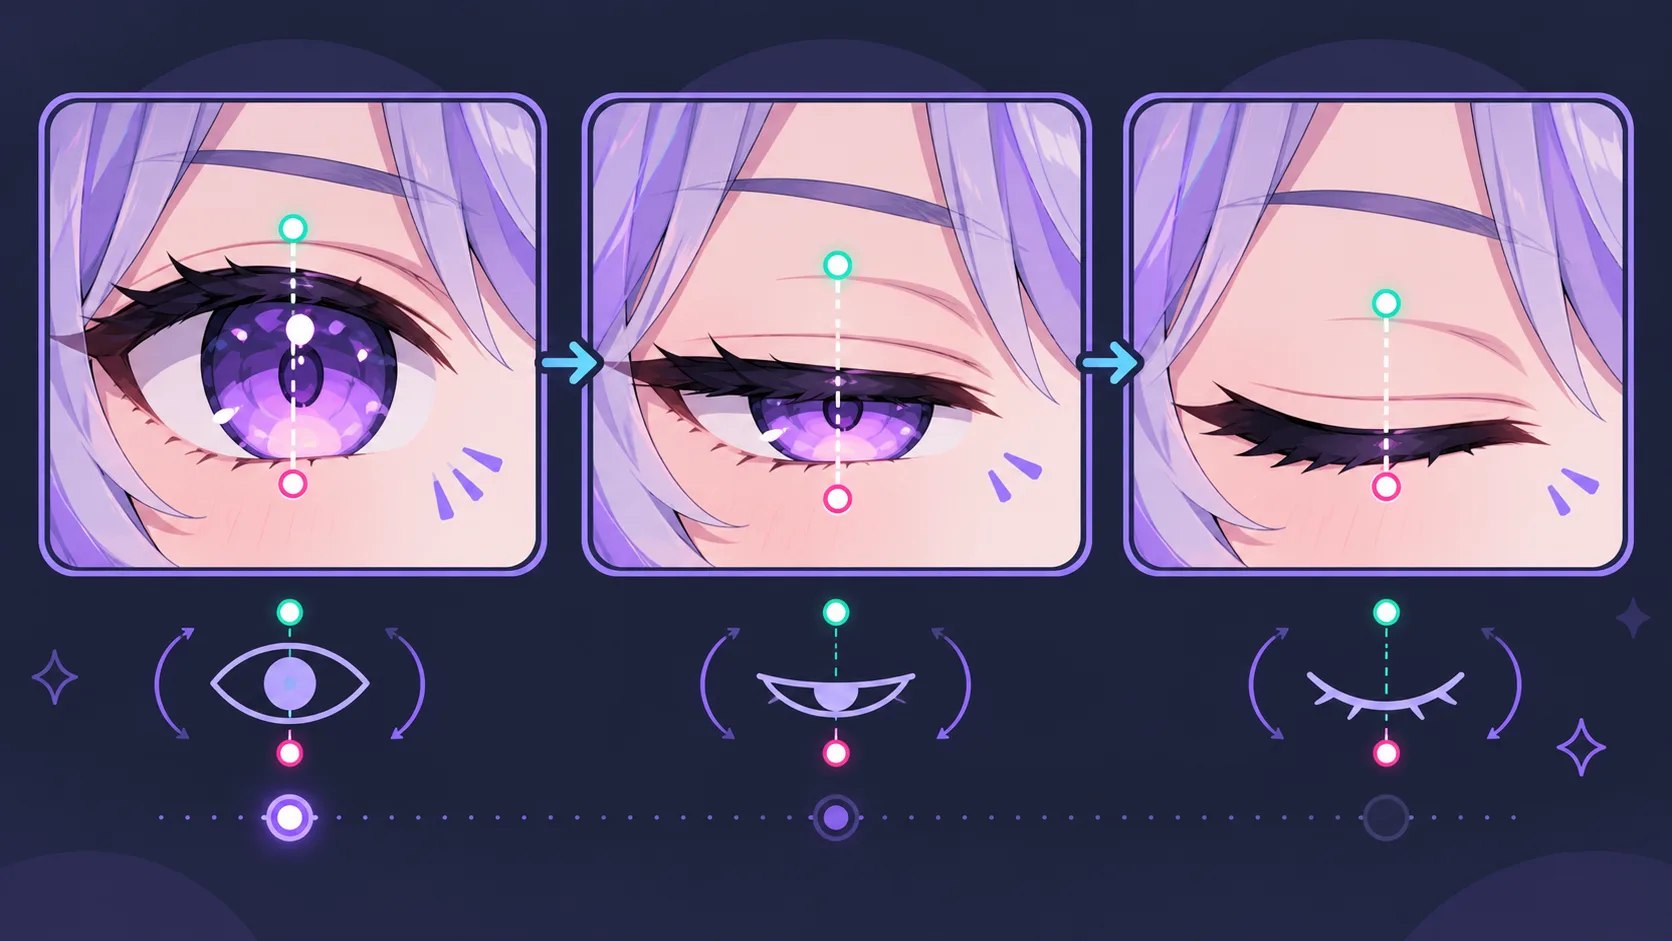
Bind ParamEyeLOpen / ParamEyeROpen to vertical scale of the eye art, not position. Keep left and right separate so you can wink later. Add an idle blink on a 2–6 second random interval with a ~120 ms close—independent of tracking—so the avatar does not freeze wide-eyed when the camera drops your face. If the blink “flashes,” the 0.5 keyform is missing or has no easing.
Scrub mouth and eyes from 0 → 0.5 → 1 before you pile on hair physics or ten unused expressions.
Clean motion before you add more polish
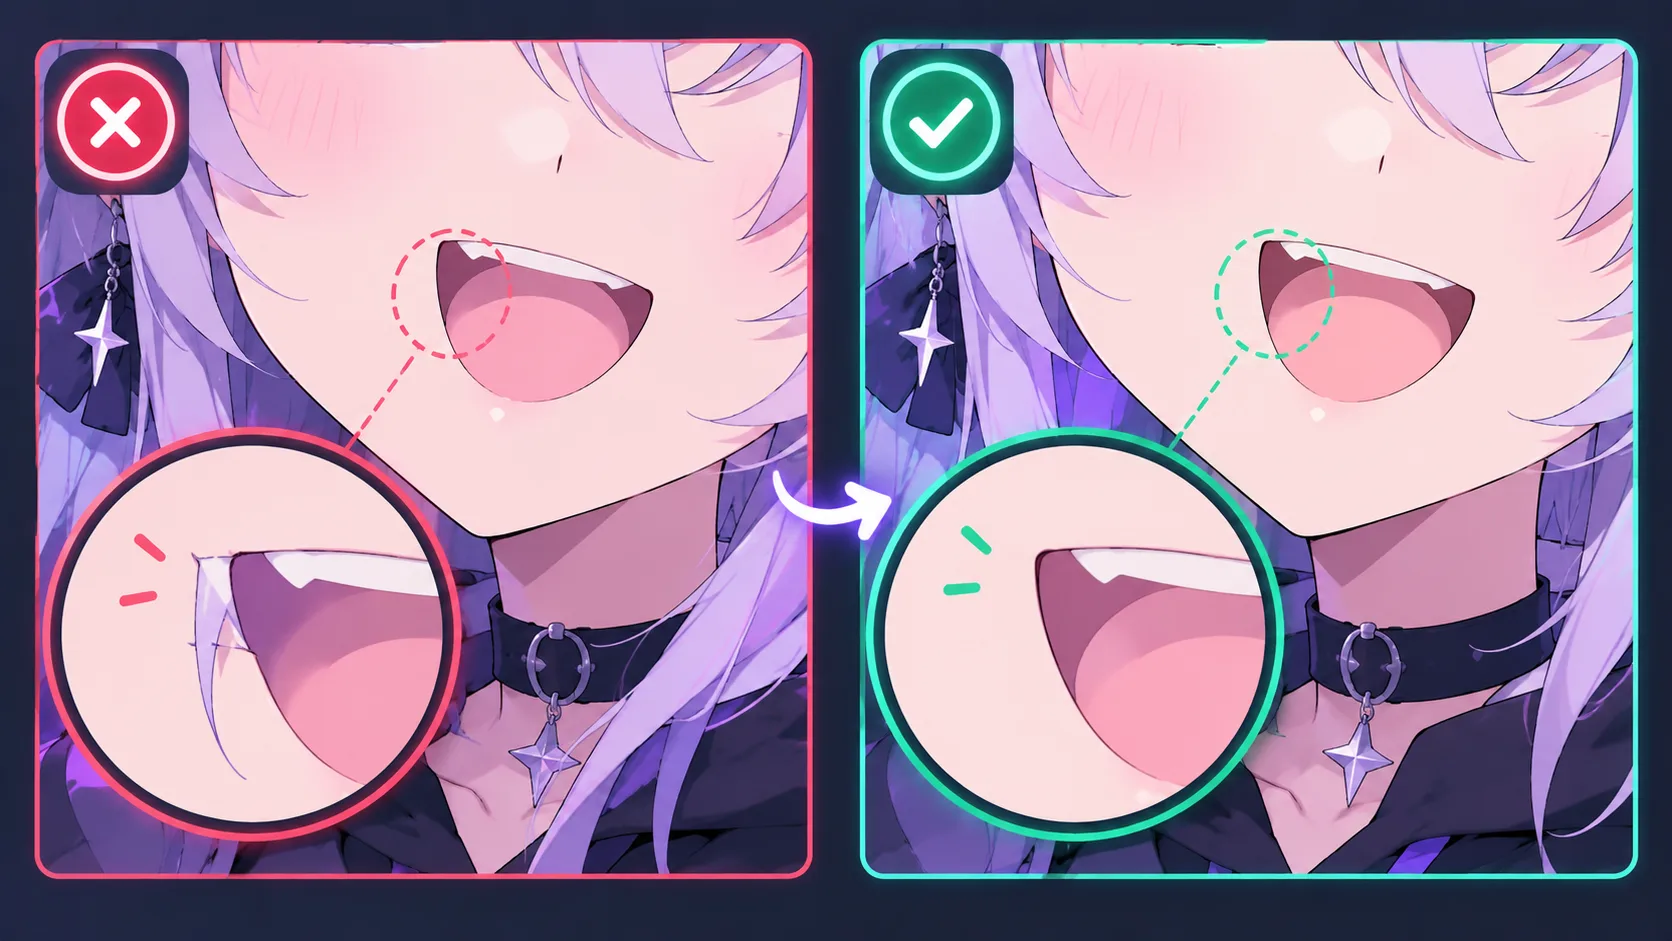
Clipping: art leaves its visible layer at extreme deformer values. Fix draw order (z-index) or give the drawing extra margin before you rebuild meshes. Hair that vanishes behind the head at AngleX = ±30 is often draw order, not a bad mesh.
Ease, not linear: switch mouth and major hair keys from linear to ease-in/out so motion does not feel robotic.
Fewer anchors if it jitters: more anchors are not always better. If a strand buzzes mid AngleX, delete the ones that fight each other and keep the silhouette.
Extreme-pose pass: push AngleX both ways → mouth open to 1 with hair physics on → fix draw order first → ease keys → remove fighting anchors. Bang eating the mouth is usually order, then physics gain.
Hair physics that lags like real weight
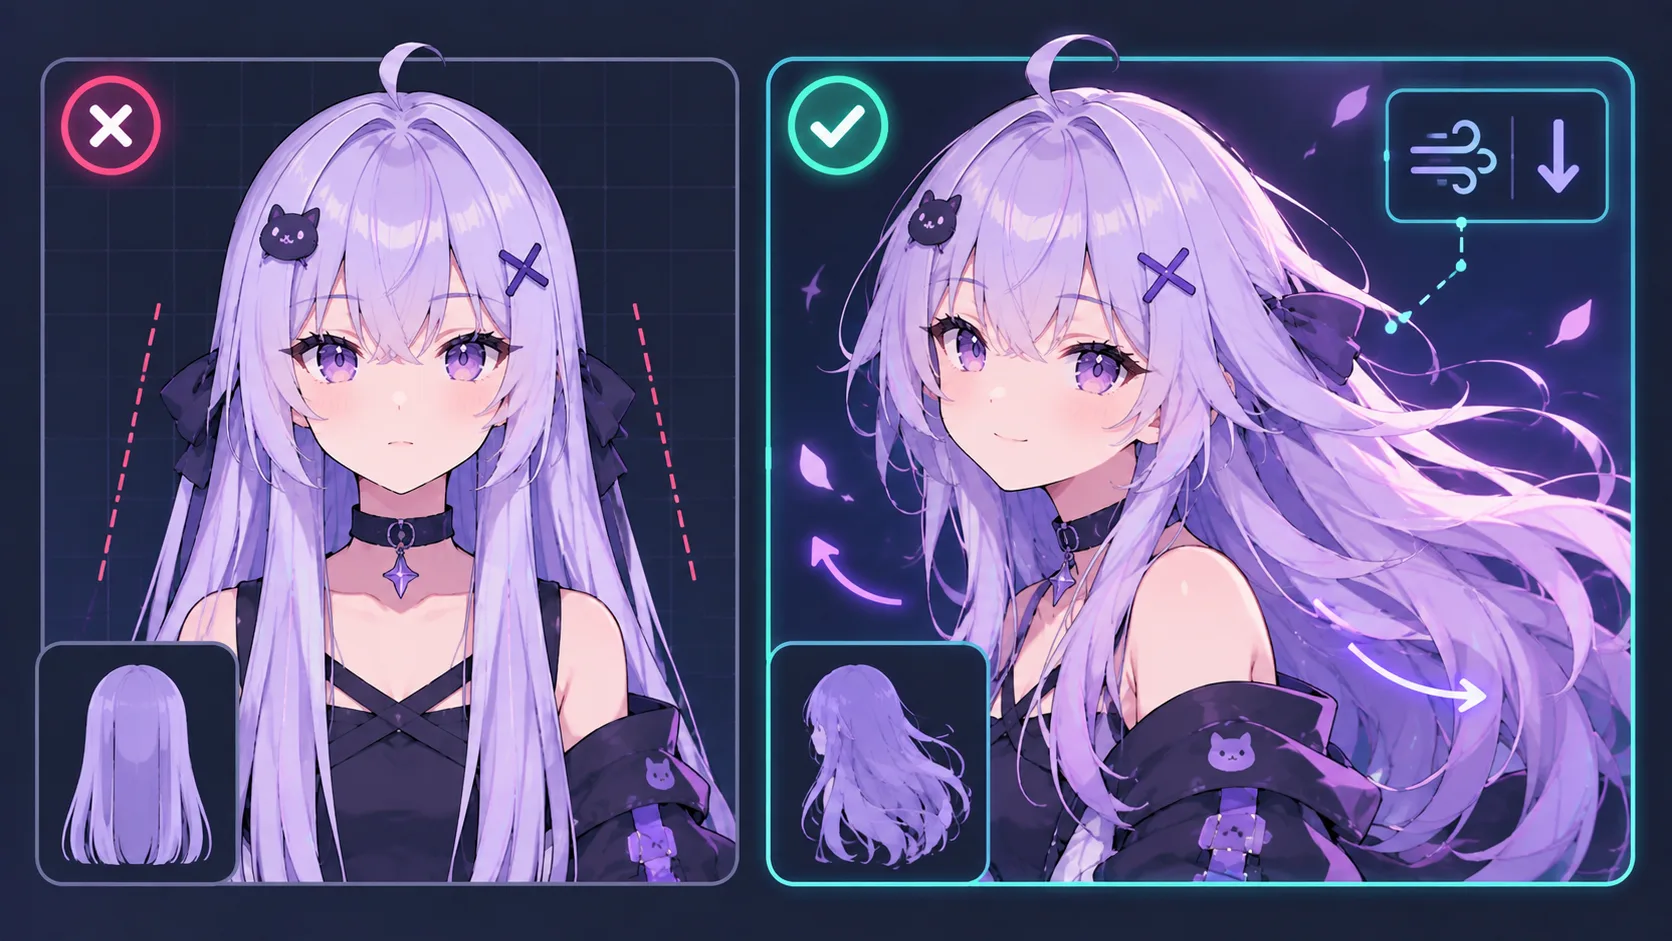
Static hair is the clearest “amateur vs polished” tell. Start with one bang and one sidetail—not the whole head.
- Bind a parent deformer to the skull.
- Add a child on the tip (or mid → tip for longer hair).
- On the child: gravity down, mid air resistance, return speed that settles in roughly a third to half a second after a shake.
- Scrub AngleX hard. Children should lag, not lockstep, not float forever.
| Look | Change |
|---|---|
| Floaty / underwater | Raise air resistance |
| Stiff / glued | Lower air resistance |
| Snaps back | Soften return speed |
| Never settles | Raise return speed a little |
| Gap at the scalp | Fix parent bind / hairline mesh first |
Longer hair usually wants slightly more air resistance than bangs. Copy settings, then nudge.
Expression sets you will actually fire
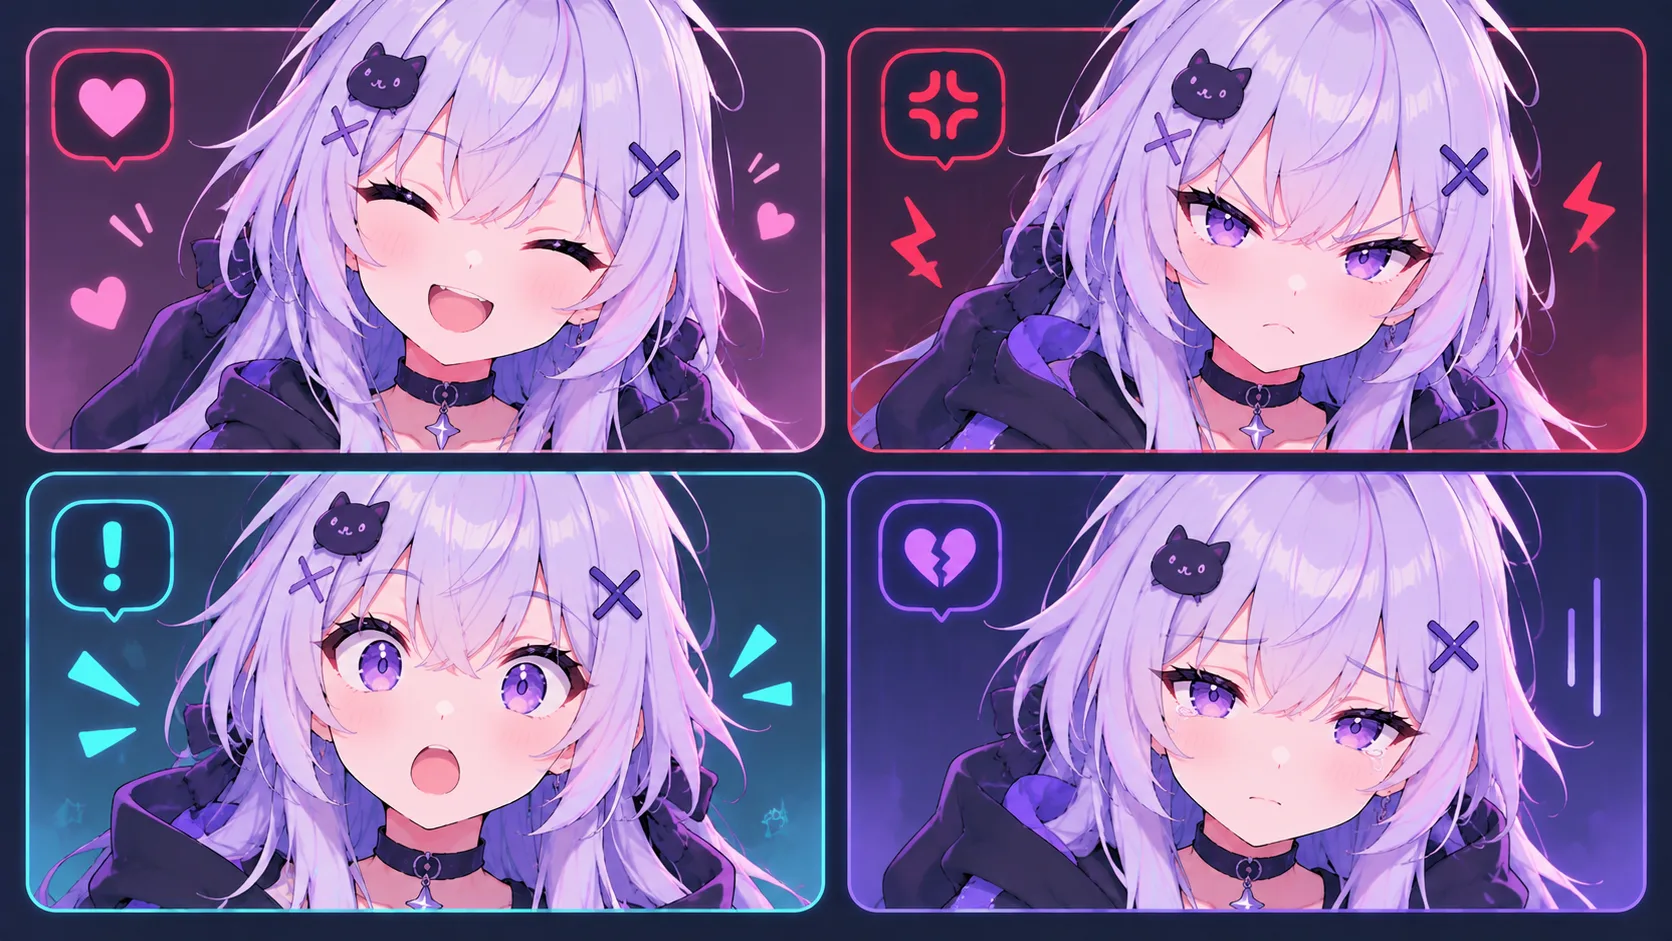
Neutral + mouth-open feels flat on a long stream. Build at least four presets:
- Happy — eyes slightly closed (arc), smile, brows gently raised
- Angry — brows down/inward, mouth straight or down
- Surprised — eyes very open, brows max, mouth in an “o”
- Sad — brows up in the center (house), mouth down
Exaggerate a little more than feels natural in the editor—at stream size, subtle brows disappear. Keep mouth tracking usable: if a preset freezes ParamMouthOpenY, you look dubbed when you talk. After the beat, release so tracking takes over; a face stuck on “surprised” for thirty seconds reads as a bug.
Hotkeys that survive a donation read
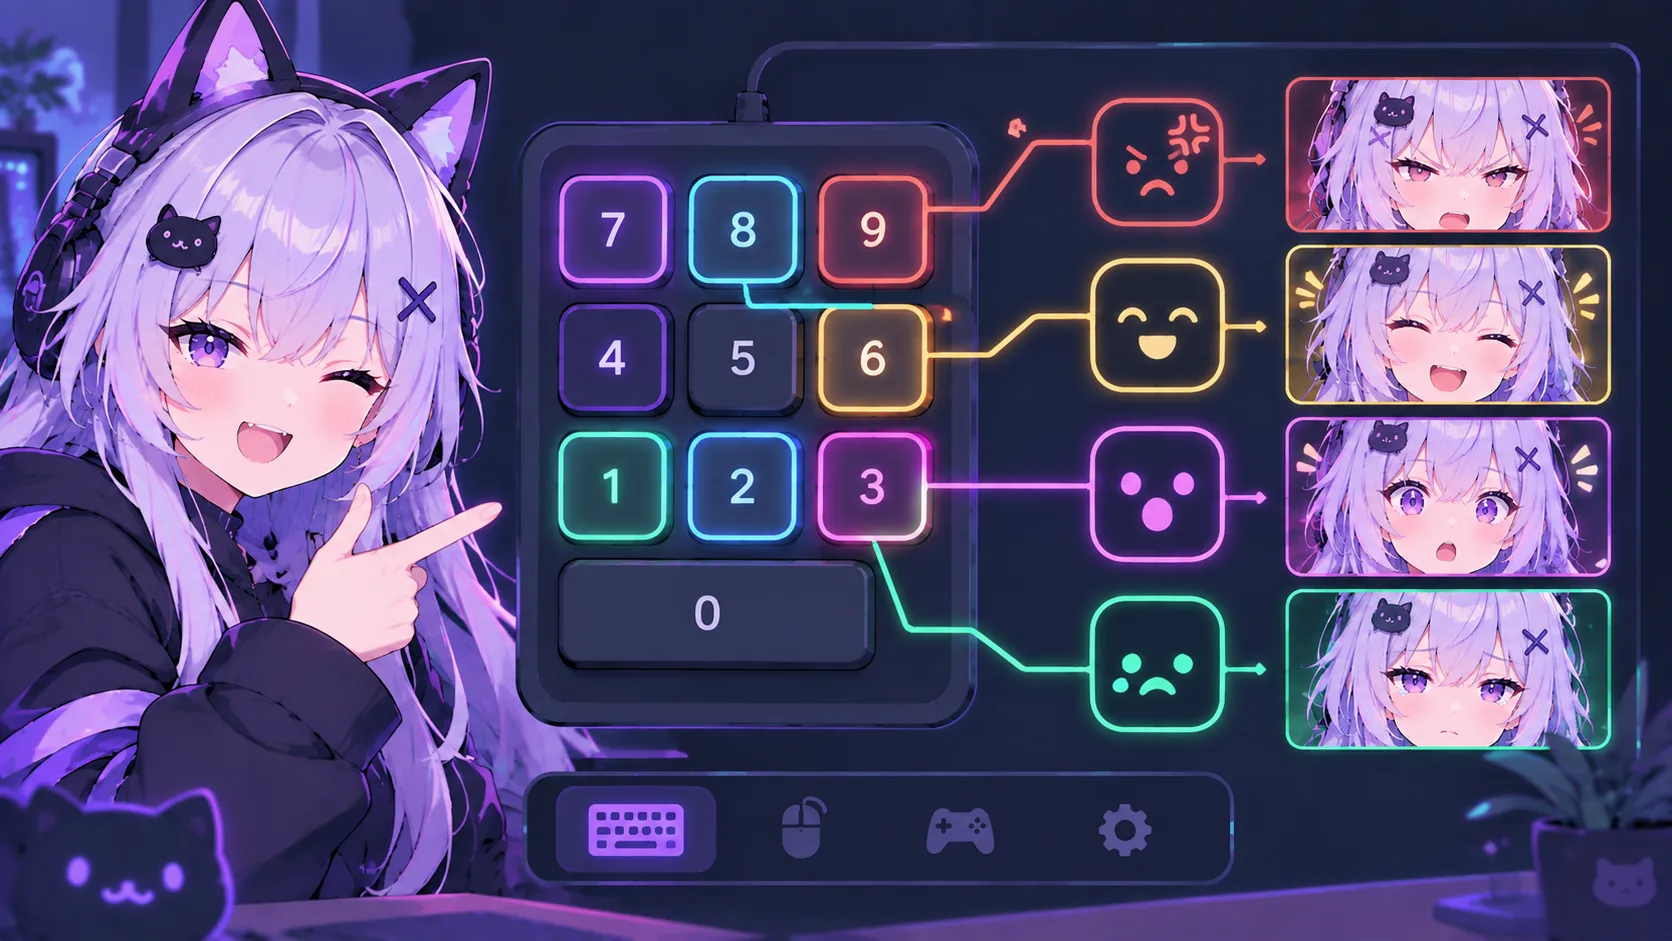
In VTube Studio, map the four presets to the numpad so you do not steal game keys: 1 Happy, 2 Angry, 3 Surprised, 4 Sad (0 optional = clear/neutral). Prefer hold-to-temp so release returns to tracking. If the face pops on release, strip the fighting parameter from the preset or add a short deactivate fade (a few hundred ms).
Tape the map beside the keyboard for week one. Check OBS and game bindings so push-to-talk or scene keys are not on the same pads. Drill random emotions until you can hit a key in about two seconds without breaking character.
Chat events → expressions (keep it tiny)
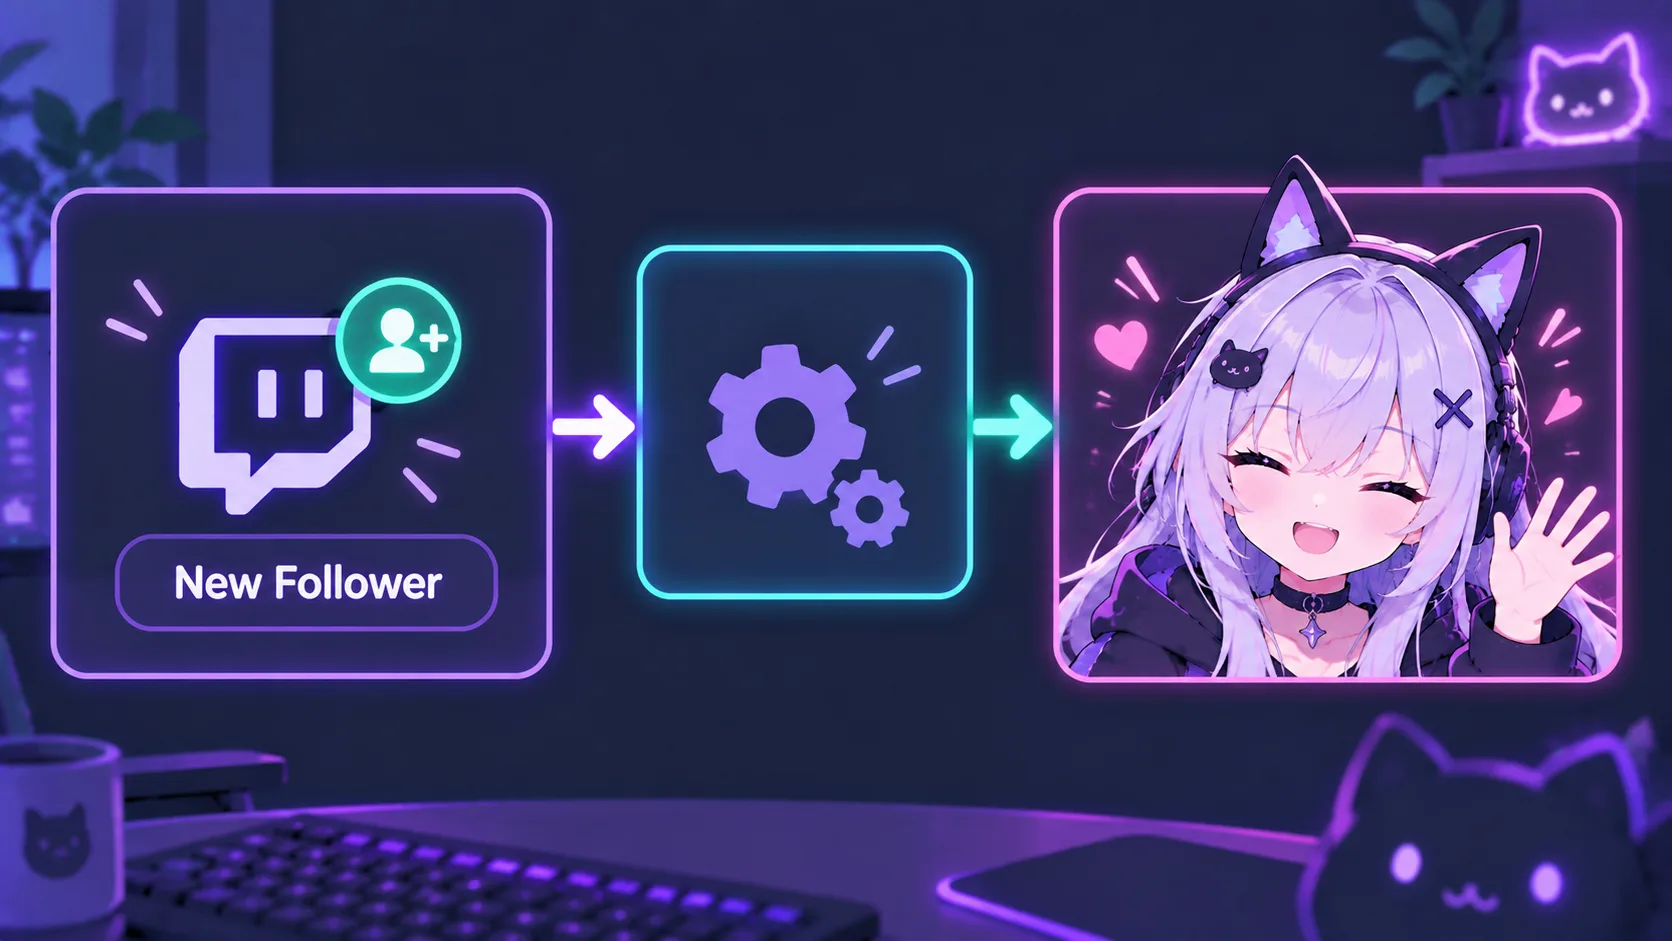
Reuse those same presets with simple event → action rules (VTube Studio hotkeys by hand, or any chat/alerts tool you already use—no custom bot required to start):
| Event | Action | Notes |
|---|---|---|
| Follow | Happy (short) | Soft welcome |
| New sub | Surprised | Bigger beat |
Exact keyword (e.g. !bonk) | Angry | Exact match + cooldown |
Add a 30–60s cooldown per user on keywords. Prefer overwrite for face expressions (newest emotion wins) and queue for sounds so jingles do not stack. If automation is offline, the stream must still work—hotkeys are the backup. Test with a second account before trusting it live.
Build your first OBS scene
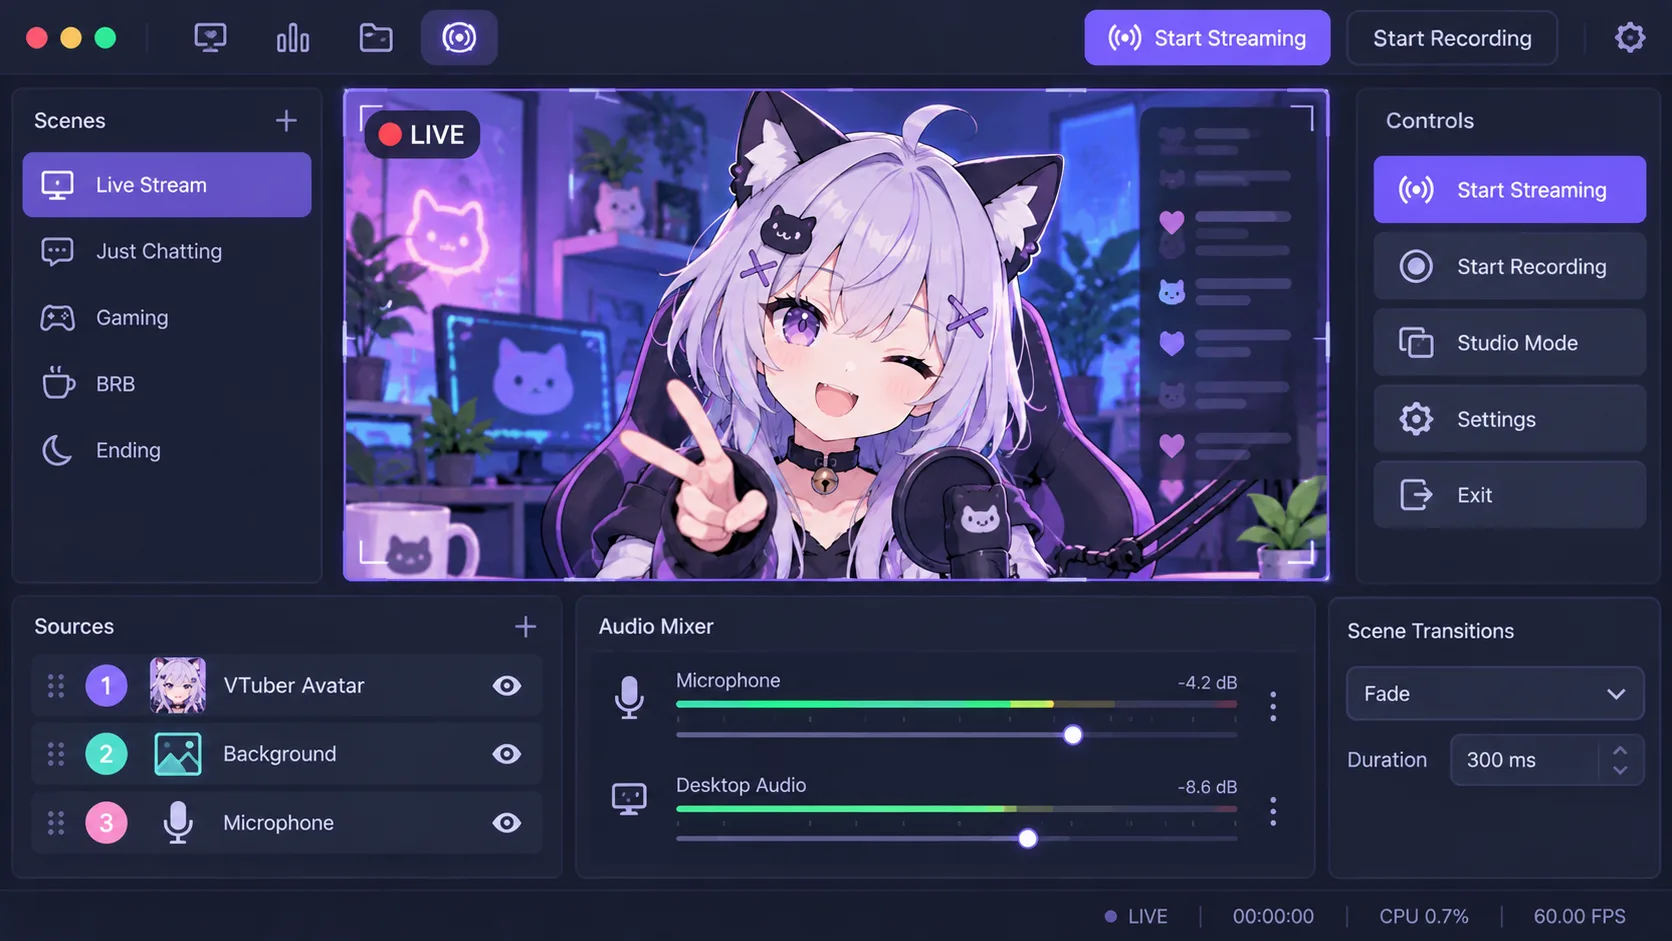
- Create a scene named something durable, for example
Live. - Add Video Capture Device → the virtual camera from VTube Studio or VSeeFace. If it is missing, enable virtual cam in the tracker, then restart OBS.
- Place the avatar (usually lower-third or mid-frame). Leave empty space for a name plate; do not glue the character to every edge.
- Add a simple background behind the avatar in the source list.
- Put the microphone on its own source—never only Desktop Audio. Talk while watching the mixer; peaks around -12 to -6 dB are healthy. Red means turn gain down.
- Record a 30-second local clip on headphones and check: avatar in frame, mouth and blink tracking, clear voice, no echo, no black frames.
| Setting | Starter choice |
|---|---|
| Canvas | 1920×1080 |
| If CPU struggles | Scale output to 1280×720 |
| Mic | Own source, never only Desktop Audio |
| Problem | Fix |
|---|---|
| Virtual cam not listed | Enable VCam in tracker → restart OBS |
| Echo | Mic also on desktop audio—mute desktop or exclude mic |
| Avatar tiny / huge | Transform → Fit, then nudge |
| Laggy preview | Lower canvas/output or close other apps |
Fix failures in the test recording before you go public.
4. Assemble gear in the right order
Spend first on sound. Chat will forgive a simple avatar. They will not stay for crunchy audio, echo, or a dying headset mic.
A practical starter kit:
- USB microphone or audio interface + XLR mic, plus a cheap boom arm
- Headphones so the mic does not hear your speakers
- A computer that can run your game and the avatar
- Webcam or smartphone for face tracking
- OBS Studio, stream deck or a small stream-deck app, and a backup of your scenes
You do not need RGB lights or a capture card on day one. You need a layout where chat, the game, and the model are readable on a phone.
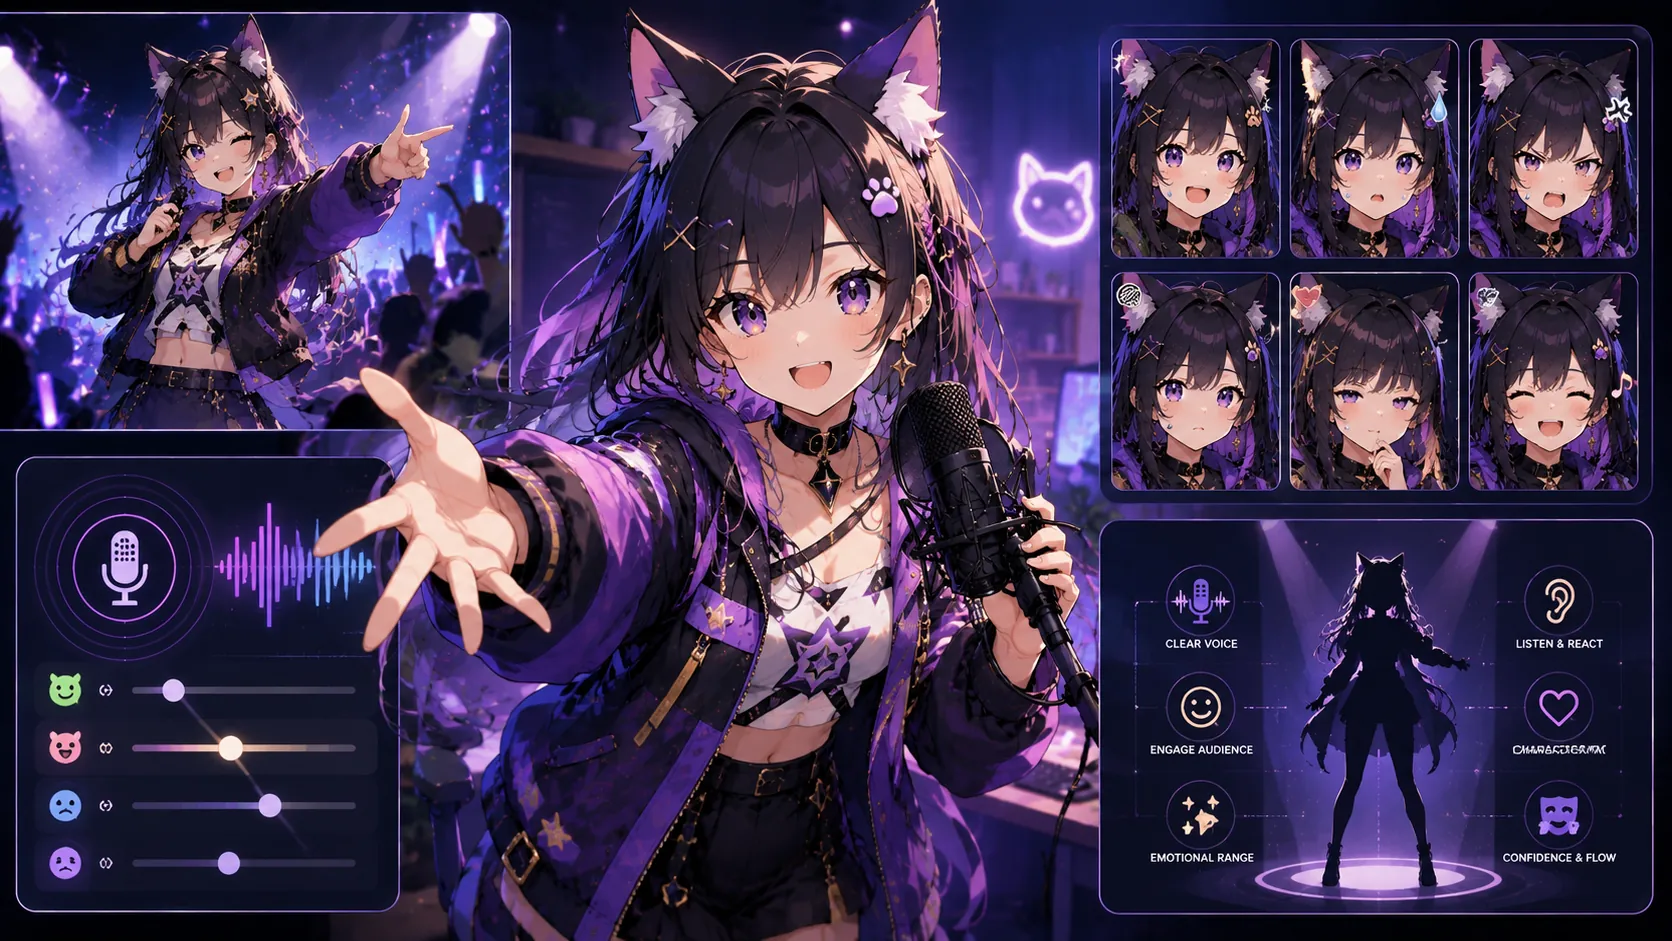
Voice that carries without scraping
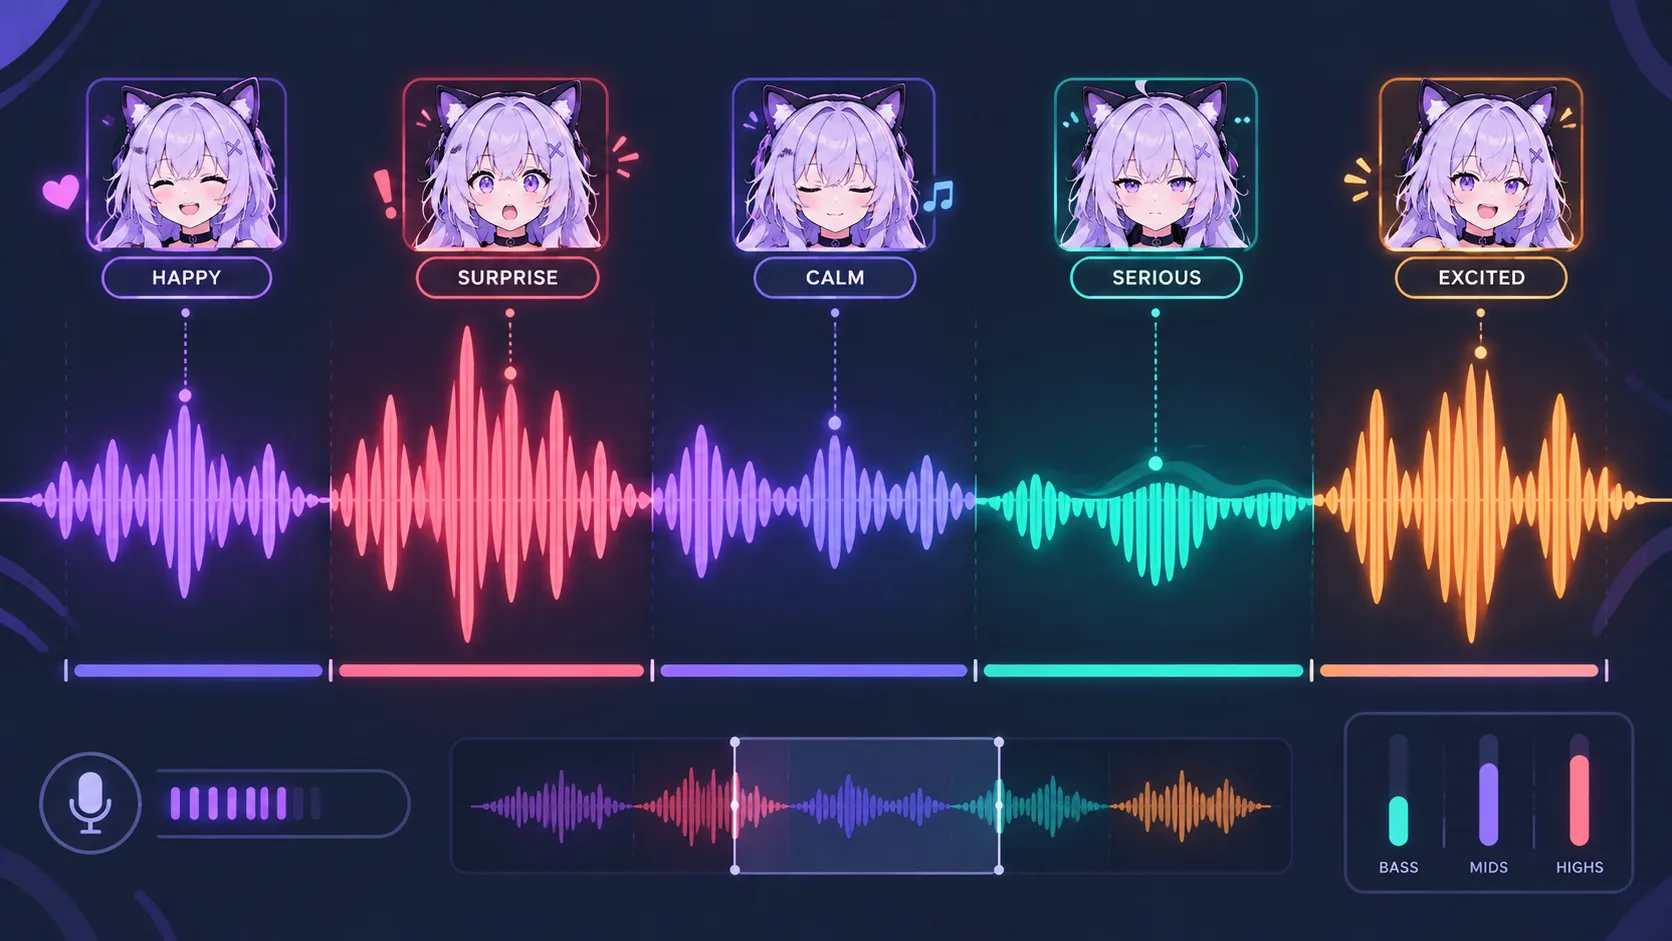
Projection vs volume: speak outward without shouting. Practice a sentence at conversation volume, then the same sentence projected—the meter should not jump just because the voice “lands.” Find the character’s neutral pitch, then leave it for emotion. Deliberate pauses beat rushing. If you use a character voice, hydrate and rest every 45–60 minutes; pain is a stop sign.
Five-minute warm-up: gentle hum → lip or tongue trills → one paragraph conversational then projected → water (not ice-cold if that tightens your throat). Mic about a fist-width away, slightly off-axis. After a five-minute in-character take, listen once for pitch, once for pace, once for strain—and change one axis next session.
| Pass | Listen only for |
|---|---|
| 1 | Pitch stuck on one note? |
| 2 | Pace — any room for a pause? |
| 3 | Strain / fry / pain |
Body language the mesh can read
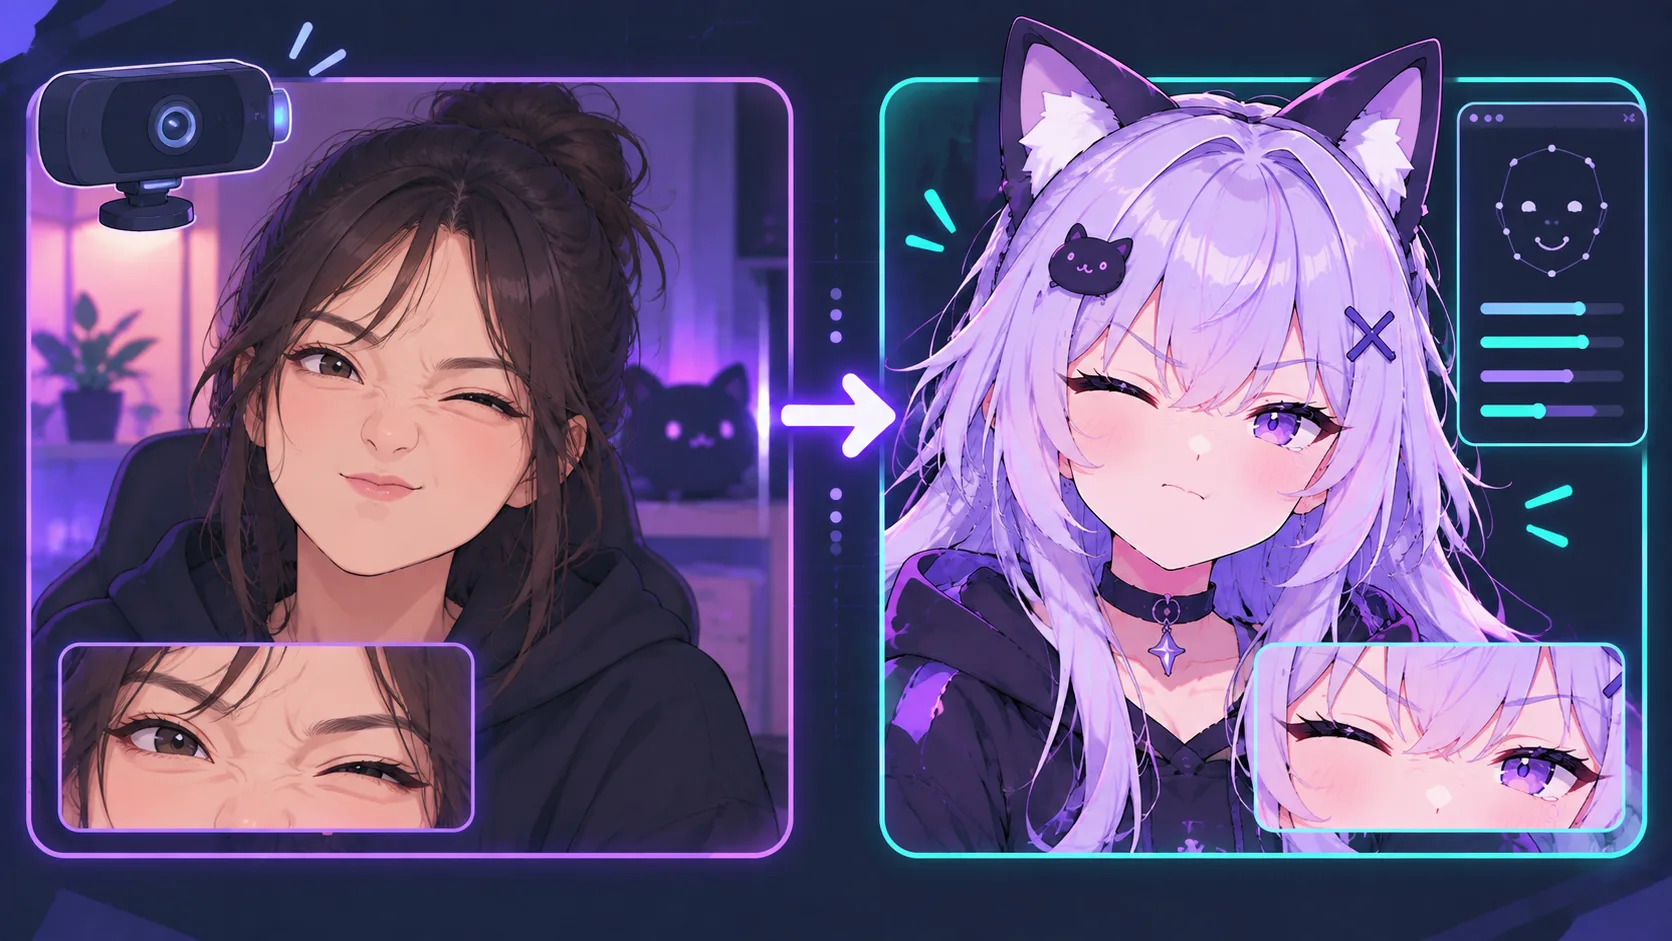
Slightly exaggerate facial expressions so they read on the model—what looks subtle in person looks flat on the mesh. Keep short reactions (1–2 seconds), not a held face. If a laugh does not move the mesh in a test recording, the performance is too small, not the rig.
Pick three cues and name them: nod (agree), head tilt (curious), lean-in (emphasis, stay in cam range). Exaggerate each about 20% past the mirror, then check the tracker preview. Head and upper shoulders visible; after a big reaction, return to calm neutral so the next beat has contrast.
A desk that does not fight the tracker
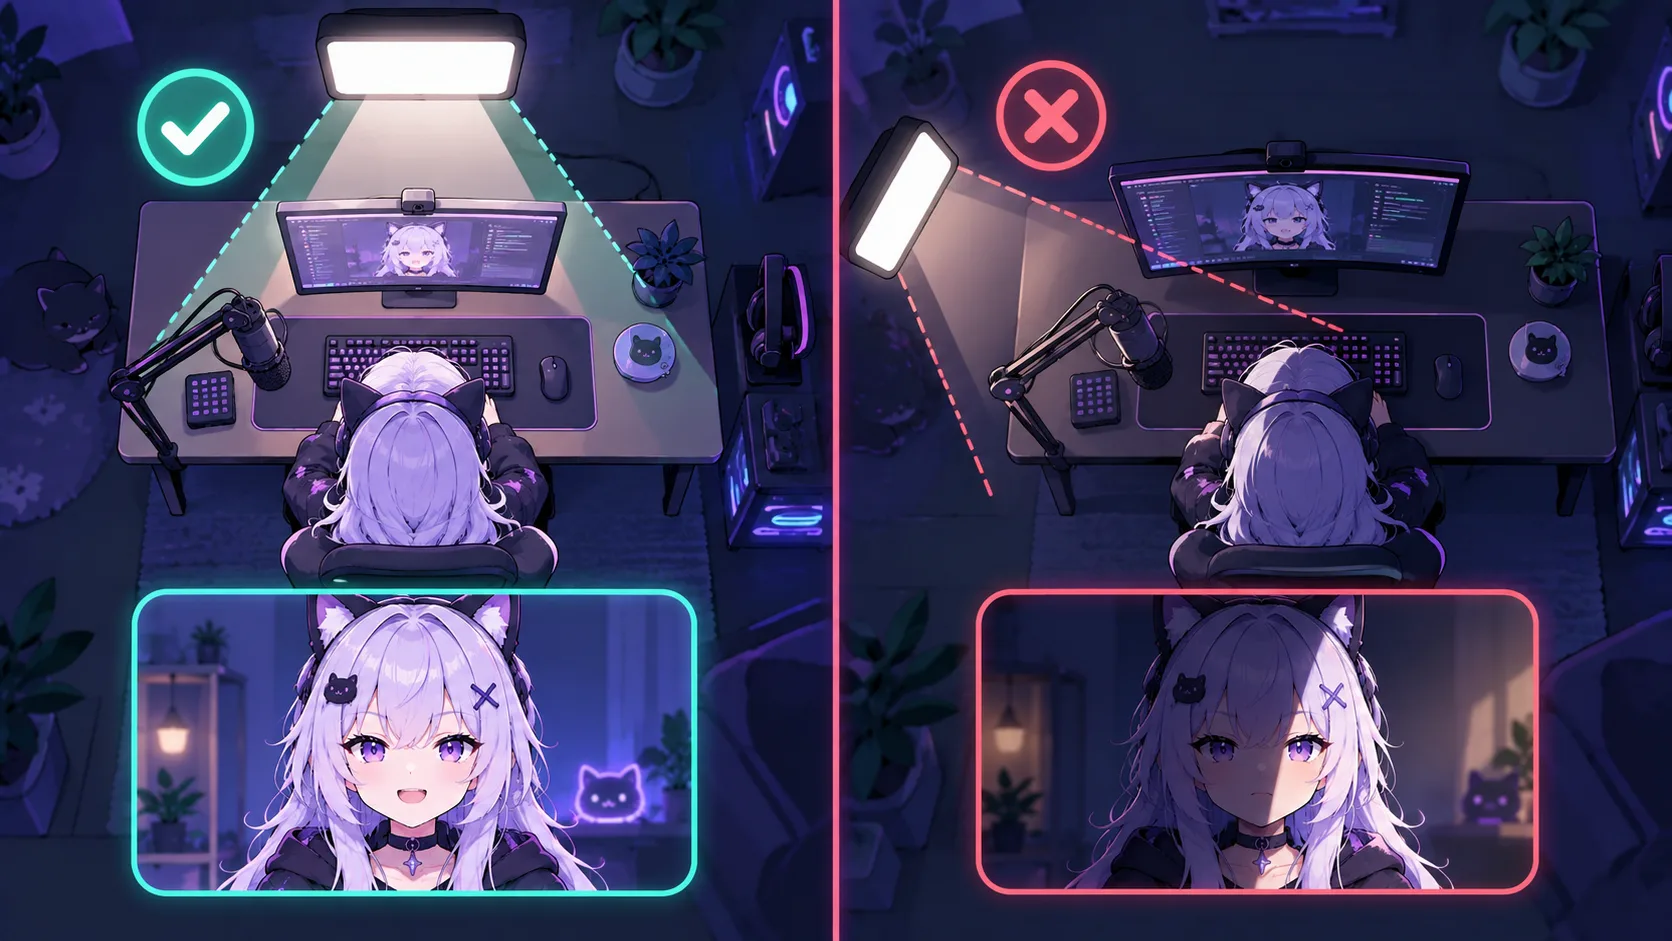
Soft front light (ring or panel)—avoid strong side light that the tracker reads as face edges. Still background (no flicker behind your head). Camera near eye level; head and shoulders about 40–60% of the webcam frame. Recalibrate every session (neutral → smile → surprise).
| Piece | Target |
|---|---|
| Camera height | Near eye level |
| Key light | Soft, in front, ~45° off center is fine |
| Background | Still; no flicker behind your head |
| Framing | Head + shoulders ≈ 40–60% of frame |
Two-minute ritual: lights on → frame check → calibrate → talk ten seconds to confirm mouth and blink. Phone-on-a-random-stack is a classic failure—mount the camera so a bump does not re-aim it mid-stream.
| Tracking symptom | Try |
|---|---|
| Drops when you lean | Move cam back or widen FOV |
| Asymmetric face | Recalibrate neutral |
| Phone cam overheating | Real webcam or lower resolution |
Multi-scene OBS (Starting Soon, Live, BRB)
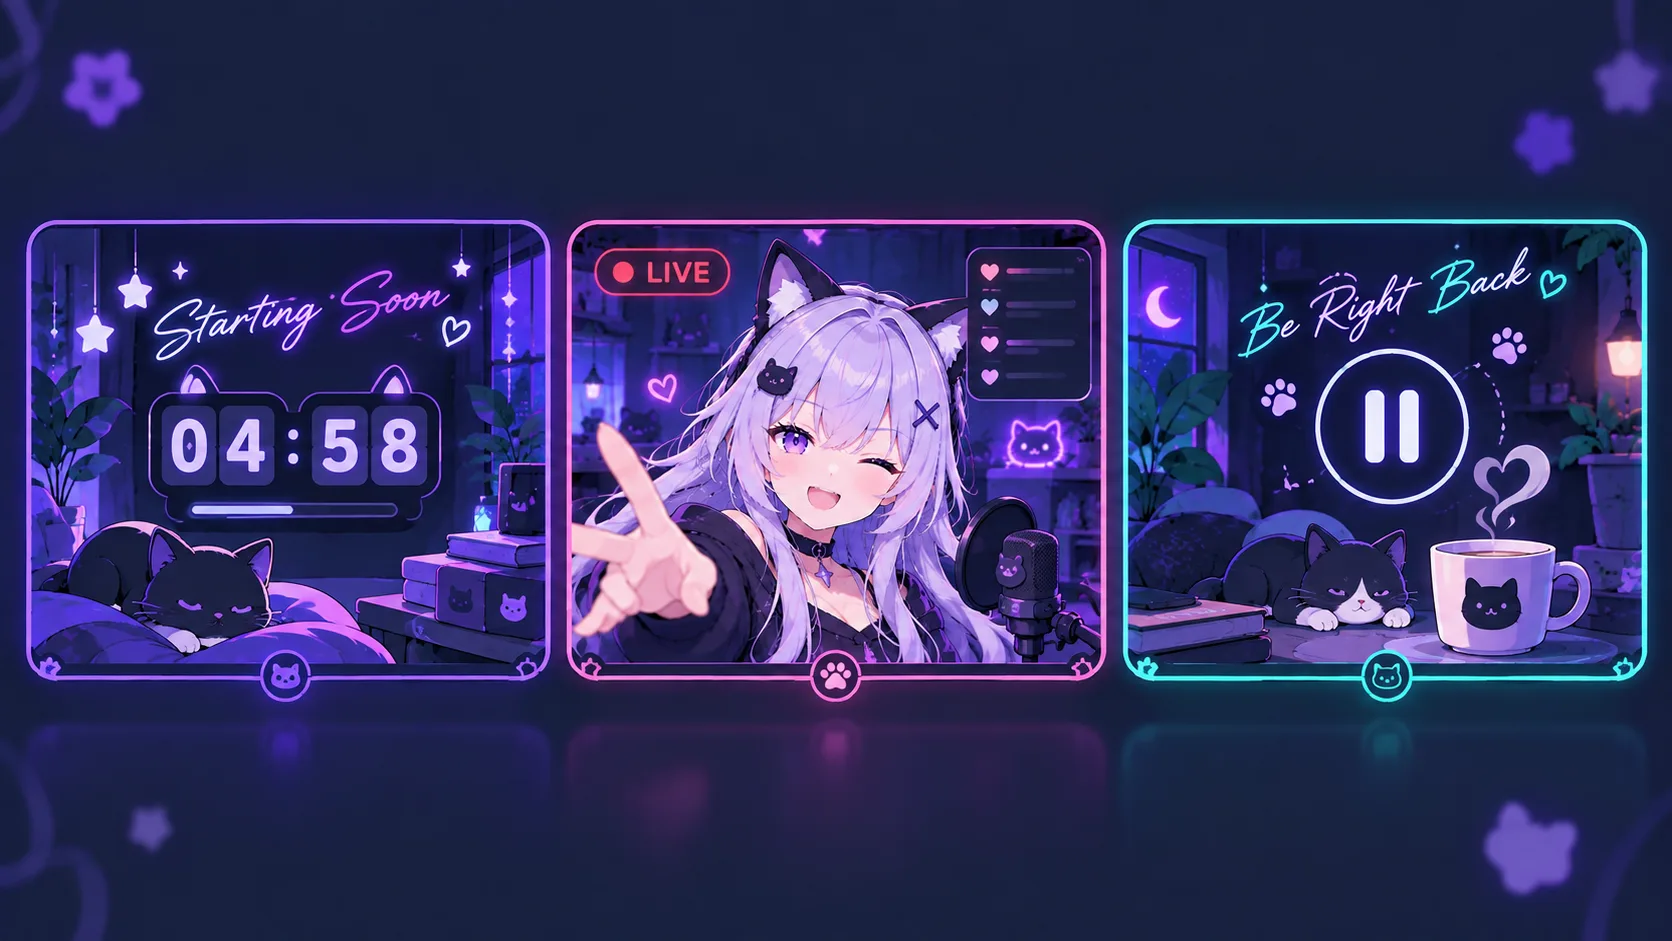
Finish Live first (avatar virtual cam + mic + overlay), then duplicate it to Starting Soon and BRB—reuse the same mic and cam references so you do not open the webcam twice. Bind hotkeys that do not collide with VTube Studio expressions. Practice Starting Soon → Live → BRB → Live until it is muscle memory.
- Starting Soon: static or looping art + “starting at HH:MM”; mic can stay muted.
- BRB: hold frame or short loop; mute mic if you leave the desk.
- Optional later:
Game + camwith the avatar small in a corner—only after the three basics work.
Time any stinger so you stop talking before the cut and resume after. Audio pops usually mean a source was added twice—fix that before the next live.
5. Plan content before the debut
Your first month should answer one question: why would someone follow this character? “I play games” is not specific enough. “This character rage-learns soulslikes and recaps in Spanish/English” is.
Useful formats for new VTubers:
- Chat-first streams with a clear theme
- One game you will actually finish
- Short clips with a punchline in the first two seconds
- A weekly slot people can remember (same day, same time)
Record a private test stream. Watch it without chat. If you would not clip it, fix audio, framing, or pacing before you spend money boosting the debut. Waiting for perfect is the same trap as never shipping a 1.0—the private test is how you ship without guessing.
6. Launch, clip, and stay consistent
Create the channel, a Discord or similar community space, and one social account you will actually check. Use the same name everywhere. Post a debut date, then honor it.
After each live, clip two or three moments. Discovery in 2026 still runs through short video and search, not only through “went live” notifications. Reply to chat in the VOD comments and on social posts; the character should feel reachable.
Consistency beats a heroic eight-hour opening that you cannot repeat. A two-hour weekly stream that happens is better than a daily schedule you abandon in week three. Ship a 1.0; save “perfect” for a 2.0 when the channel can pay for it.
Checklist before you press Go Live
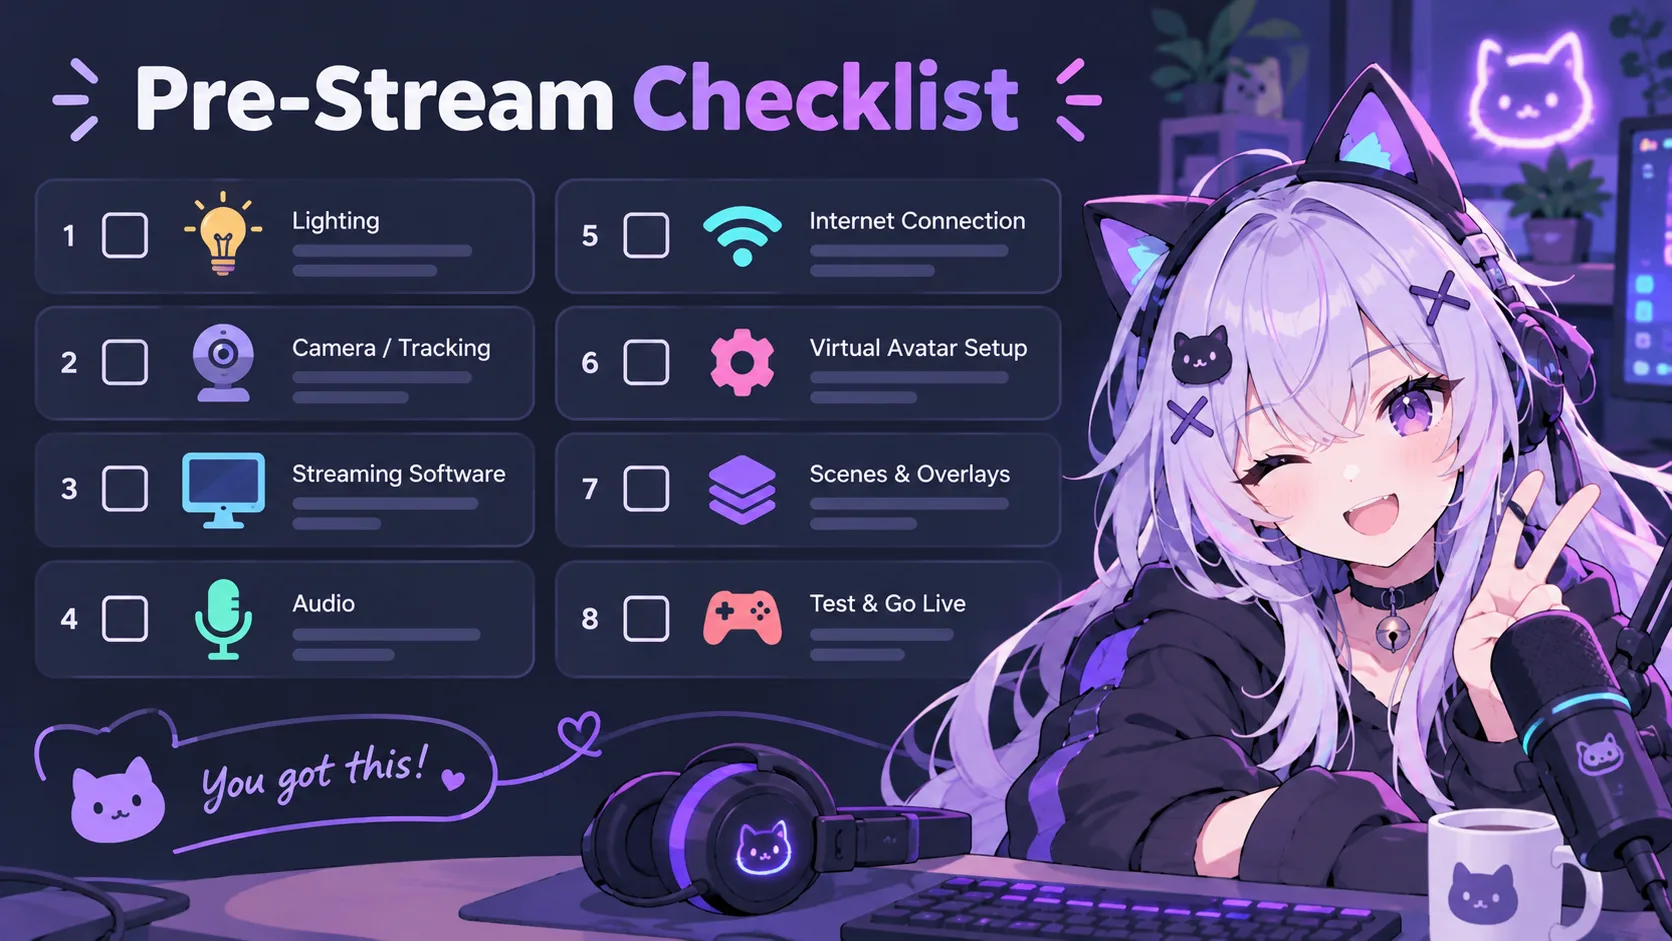
Use this the night before (or an hour before) you press Start Streaming:
- Front light on; no backlight
- Tracking calibrated (neutral → smile → surprise)
- Virtual camera on and visible in OBS
- Overlay loaded and clear of the face
- Mic level tested (not too low, not clipping)
- Stable internet (cable beats Wi‑Fi when you can)
- Correct stream key / platform connected
- One-minute test recording already watched
| Box | What fails if you skip it |
|---|---|
| Front light | Tracking drops mid-sentence |
| Calibration | Permanent smirk or dead mouth |
| Virtual cam in OBS | Black square where the avatar should be |
| Overlay aligned | Name plate covering the mouth |
| Mic level | Viewers leave in the first minute |
| Stable net | Pixel soup / disconnect |
| Stream key | Streaming nowhere or to the wrong place |
| Test recording | You discover problems only while live |
Also: phone silent, OBS scene collection exported once as backup, water nearby, chair set for 45–60 minutes, and one sentence of chat rules even if you are solo.
First five minutes (script, not panic): greet and say who you are → one line for today’s stream → when you are usually live → point to follow/social once → talk to chat. You do not need a perfect bit; you need a start that is not silence.
If public live still freezes you, stream with a clear test title or record a 10-minute “fake live” with the same checklist, then do the real debut. After End Stream, watch the first 10 minutes of the VOD and note one tech fix and one thing that felt good.
When something breaks live
Keep this open on a second monitor the first month.
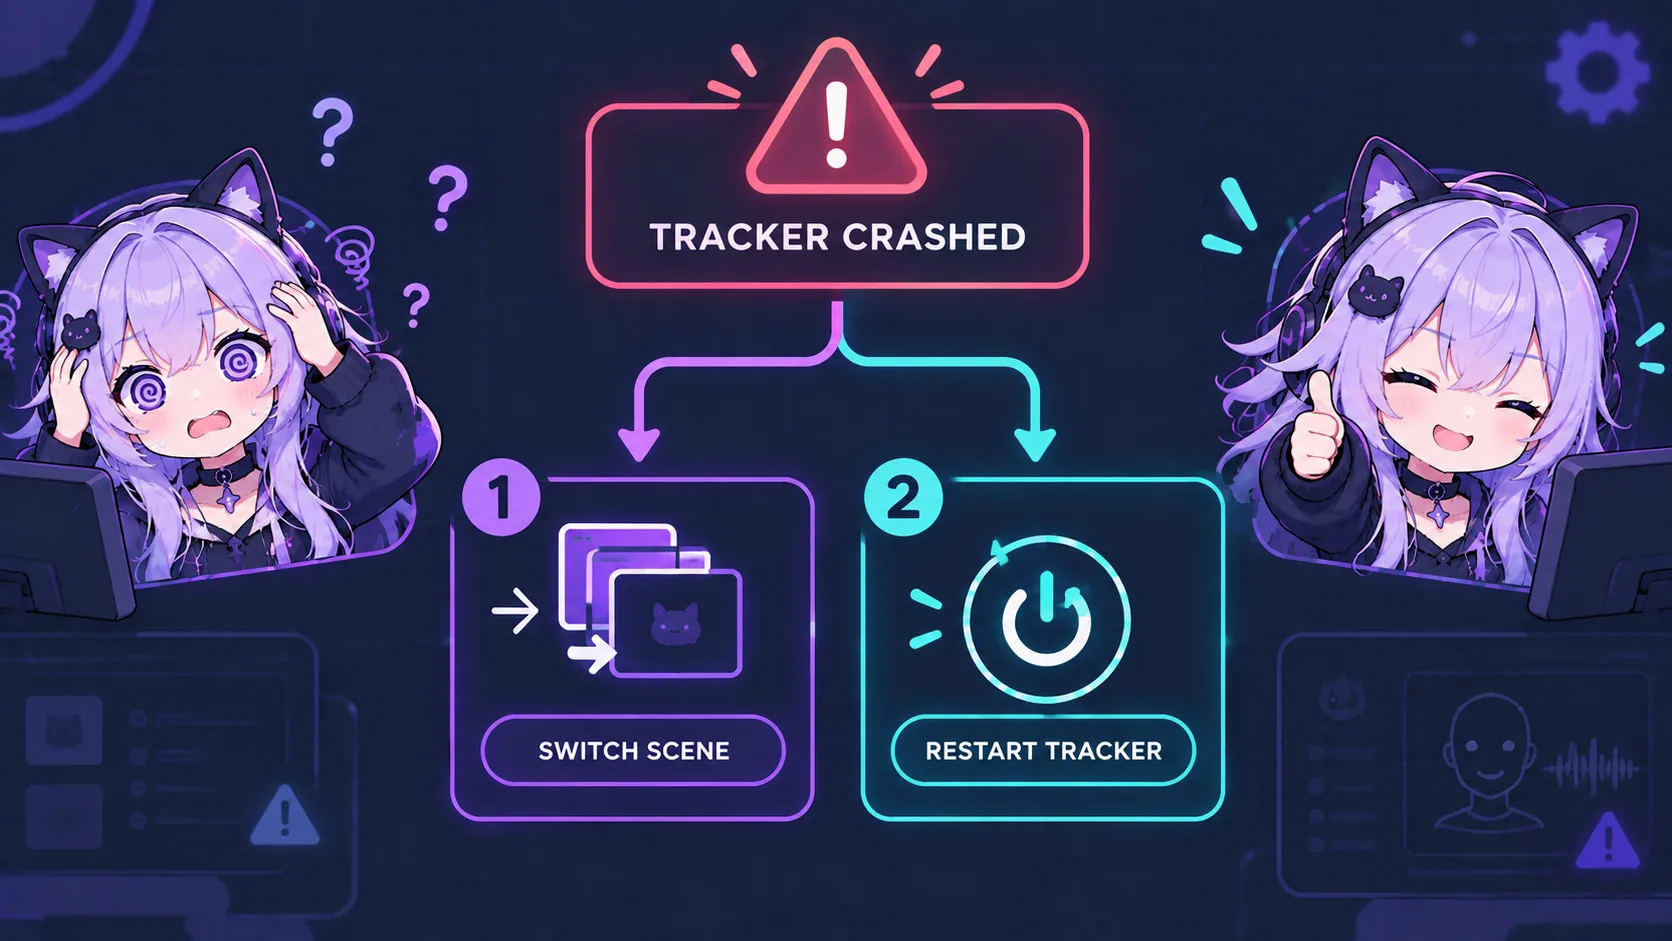
- Tracker drops: BRB in one click → restart the tracking app → return to Live.
- Connection drops: fire a pre-built “reconnecting” image; post on socials if the outage lasts.
- Audio cuts: check the OBS mixer first—most cases are a fader pulled down by accident.
- Broken / deformed mesh: reload the model in the tracking app; usually faster than diagnosing live.
- Plan B: keep a static “one moment” image source in OBS (disabled) so you can fire it in two clicks.
Write BRB, reconnecting image, and mute on a sticky note before you need them.
| Failure | First action | What you tell chat |
|---|---|---|
| No mic | Check OBS mute / fader | “Fixing audio — one sec” |
| Frozen / weird mesh | BRB → restart tracker → reload model | “Technical pause” |
| Bitrate dying | Drop to a lower-bitrate preset | “Stream’s fighting the net” |
| OBS frozen | Relaunch → Starting Soon until stable | Post on social if it runs long |
Drill once offline: mute the mic → hit BRB / fix → return to Live. Goal: recover in under about 90 seconds without inventing the sticky note mid-crisis.
7. How to make money as a VTuber, Virtual YouTuber, or AI streamer
Once the show works, money is a constraint problem—not “turn on every button.” The same discipline applies if you stream as a classic Virtual YouTuber, an indie avatar channel, or an AI streamer format: pick what you monetize this quarter, grow an audience that returns, and keep the character consistent.
Monetization models (pick an order)
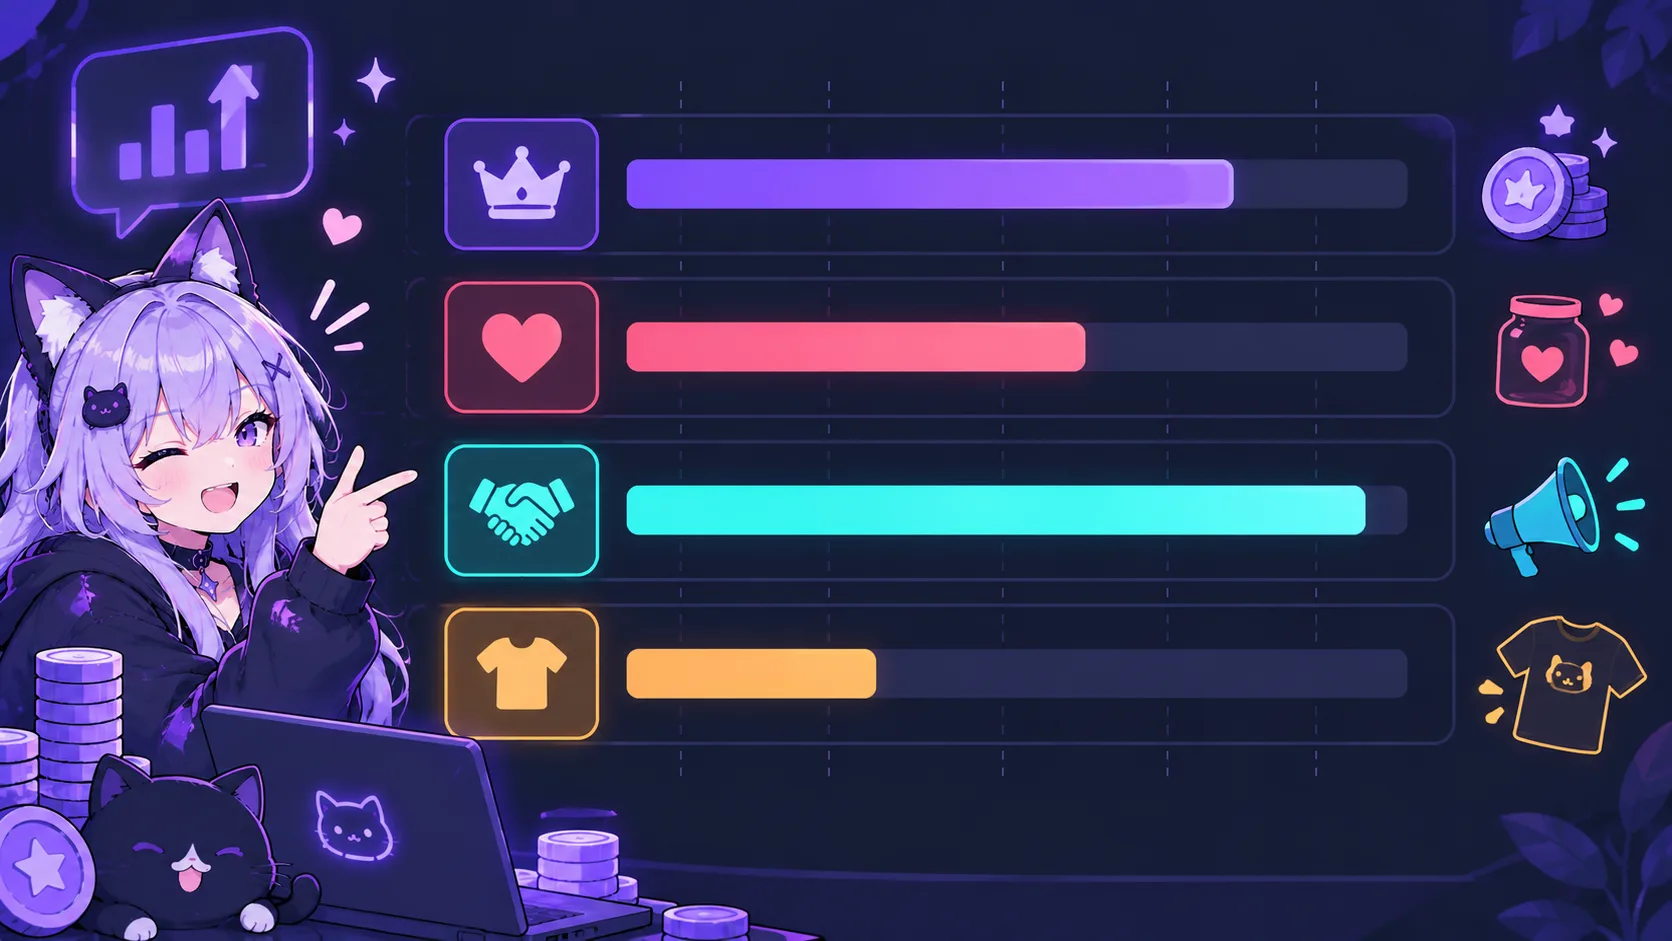
| Model | Role |
|---|---|
| Tips / donations | Variable; works when you acknowledge live (read + react) |
| Platform subs (Twitch / YouTube) | More stable—needs recurring viewers first. Empty sub buttons train chat to ignore them |
| Sponsorships | Brands want consistent metrics; not a day-1 channel |
| Merch | Thin margins until fans identify with the character, not only the content |
Recommended order: tips first (simplest), subscriptions when the same faces return weekly, sponsors/merch later. Fill a quarter board honestly: Now / Later / Not this quarter for each model—and write why. One target beats five (example: “tips on + thank every tip”).
Make tips work: link in panel/about in your tone, react with a real beat (expression hotkey helps), thank in chat if you miss live. Silence trains people not to tip again.
The weekly growth loop
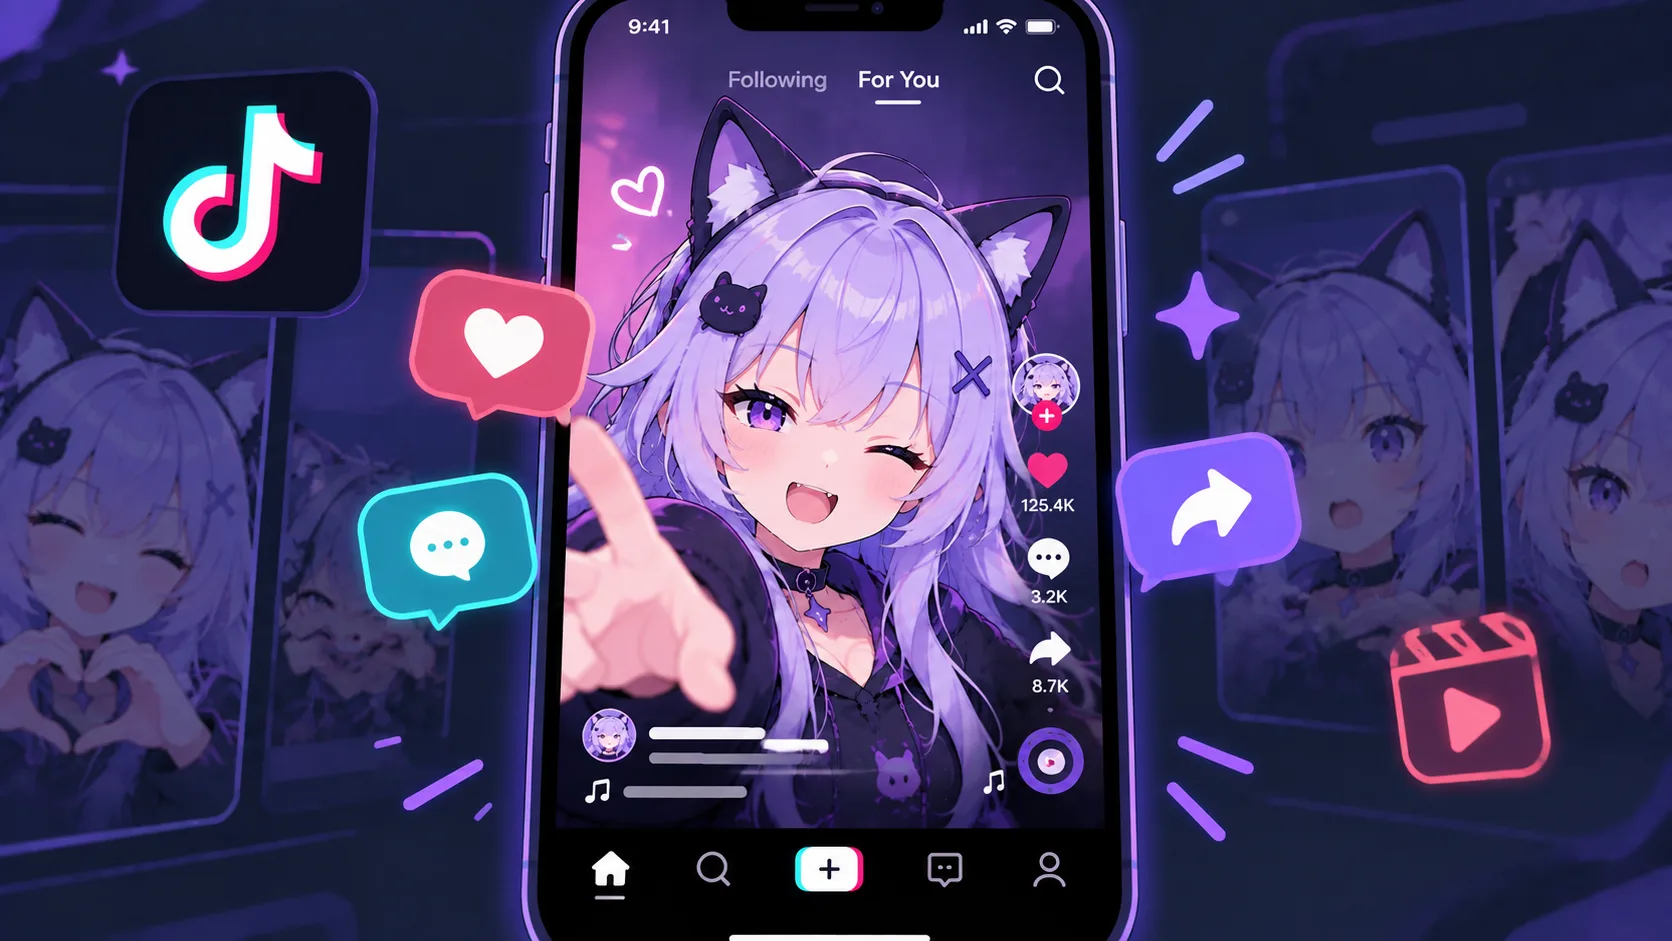
Short clips (30–60s) of avatar reactions travel best on TikTok / Shorts / Reels. Cross-post the same vertical clip to at least three surfaces—not only where you go live. VTuber audiences punish random schedules harder than many niches.
- Live on a fixed slot (protect the day even if the stream is shorter).
- Timestamp strong moments live.
- Cut one clip: hook ~2s → payoff → end card with next live time (~3–5s).
- Post to three short-form places before you sleep.
- Log one row: streamed Y/N, clip Y/N, rough new follows.
| Break | Fix |
|---|---|
| No clip ideas | Timestamp live; do not hunt the whole VOD cold |
| Slot slips | Shorten stream; keep the day |
| Only posting on the live platform | Force the three-surface rule for two weeks |
When to build a team
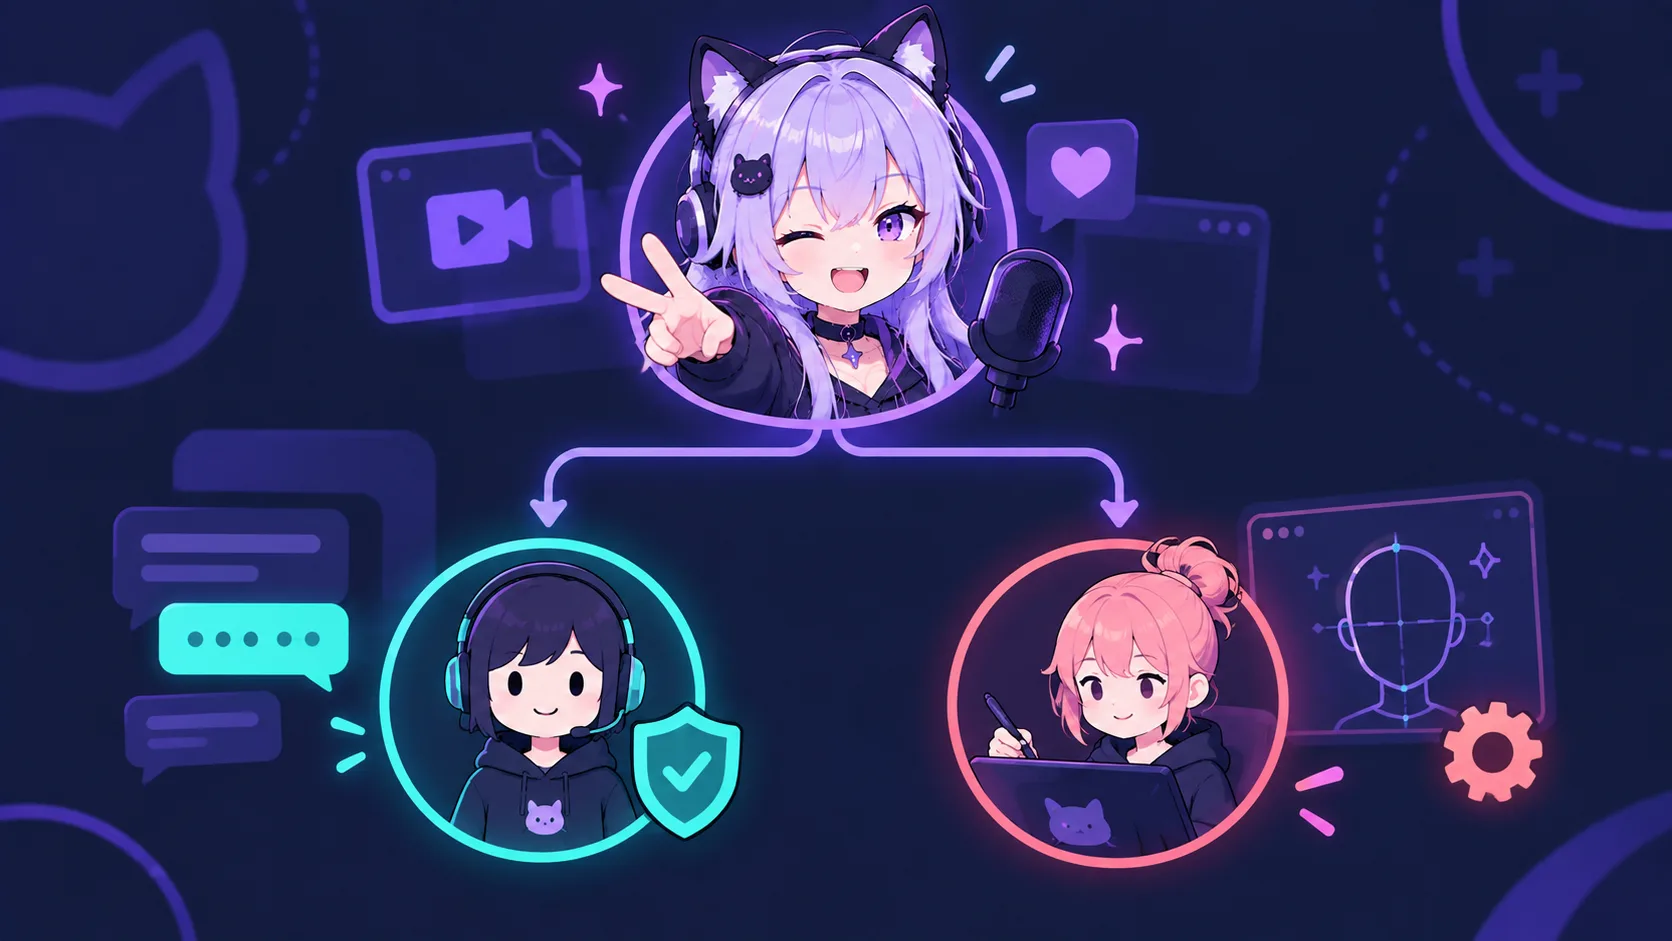
First hire is usually a mod (chat usable while you perform). Second is often rigger/artist per project for expressions and bugs—not full-time. Signal to hire: more hours on tech/admin than on creating or talking to the audience.
Map the week (stream, mod, clips, rig, email). Write a one-page brief before money moves: deliverable, out of scope, deadline, pay, 30-day trial + exit. Mods before editors in most cases—safety beats growth polish.
Migrating to 3D / VRM (optional)
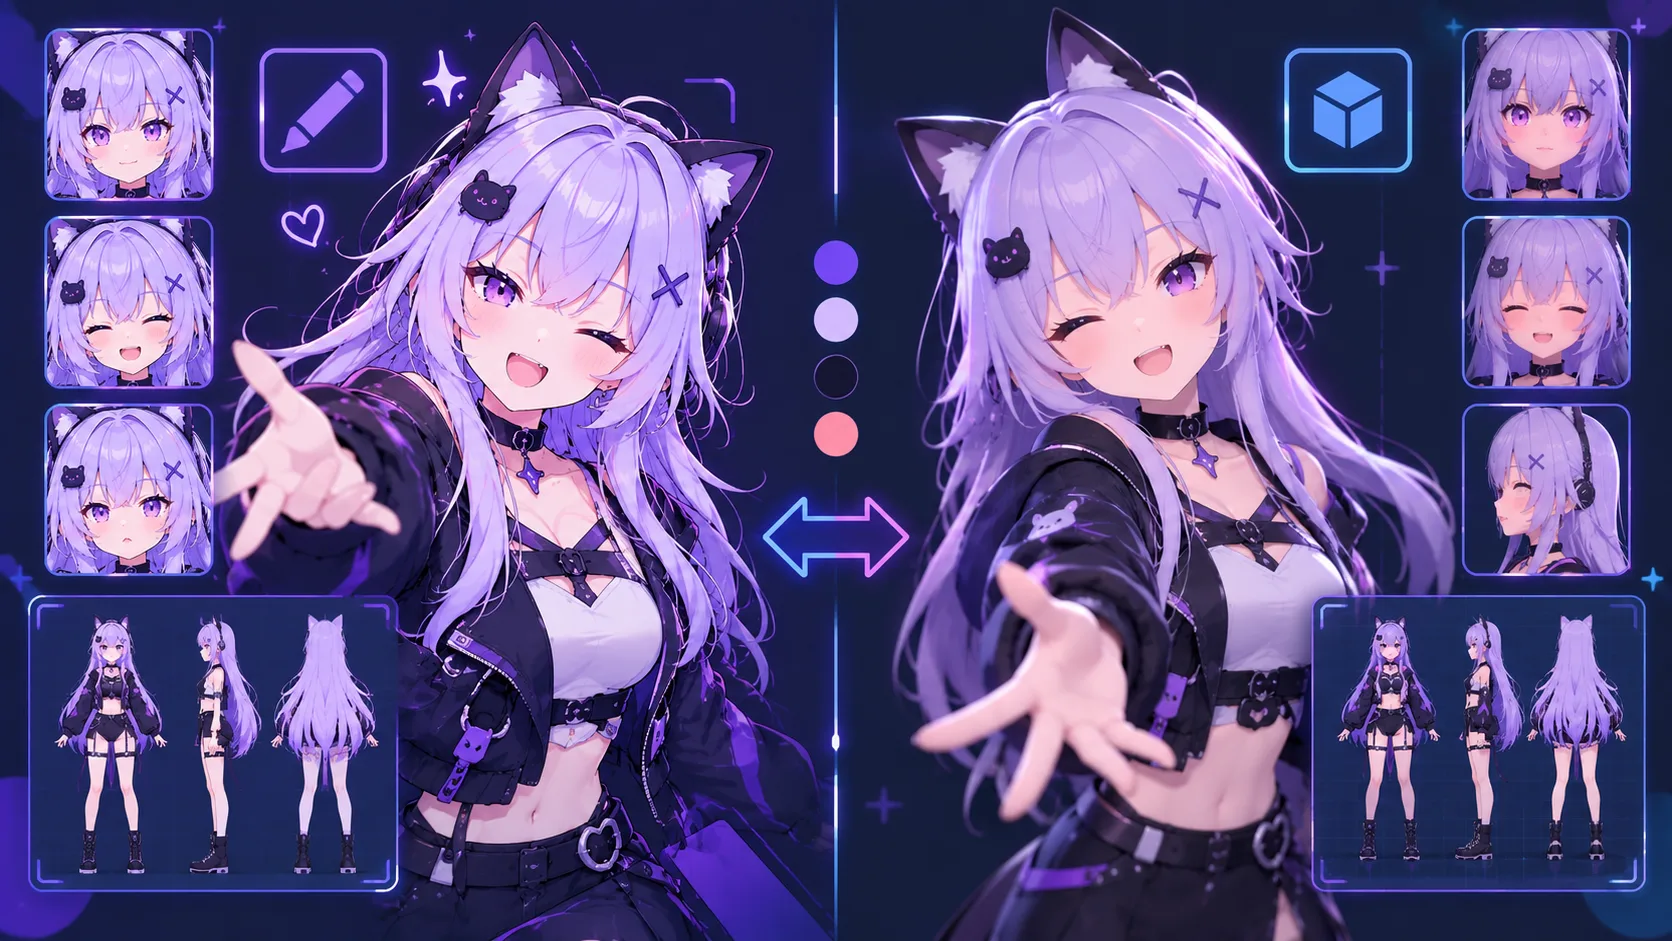
Migrate when 2D blocks something you already promised (spatial collabs, VR, full back-views)—not because “3D looks cooler.” In VRM you use bones and blendshapes instead of 2D deformers; keep the palette and personality so viewers still recognize the brand.
Go/no-go on paper: what 2D blocks, budget, debut date, or the stay-2D metric. Trial a simple VRM ~30 minutes, score head turn / physics / recognition / PC load, then decide. Soft-test a full practice stream before announcing a 3D debut. Staying 2D is a valid business choice.
Advanced chat interaction (accent, not the show)
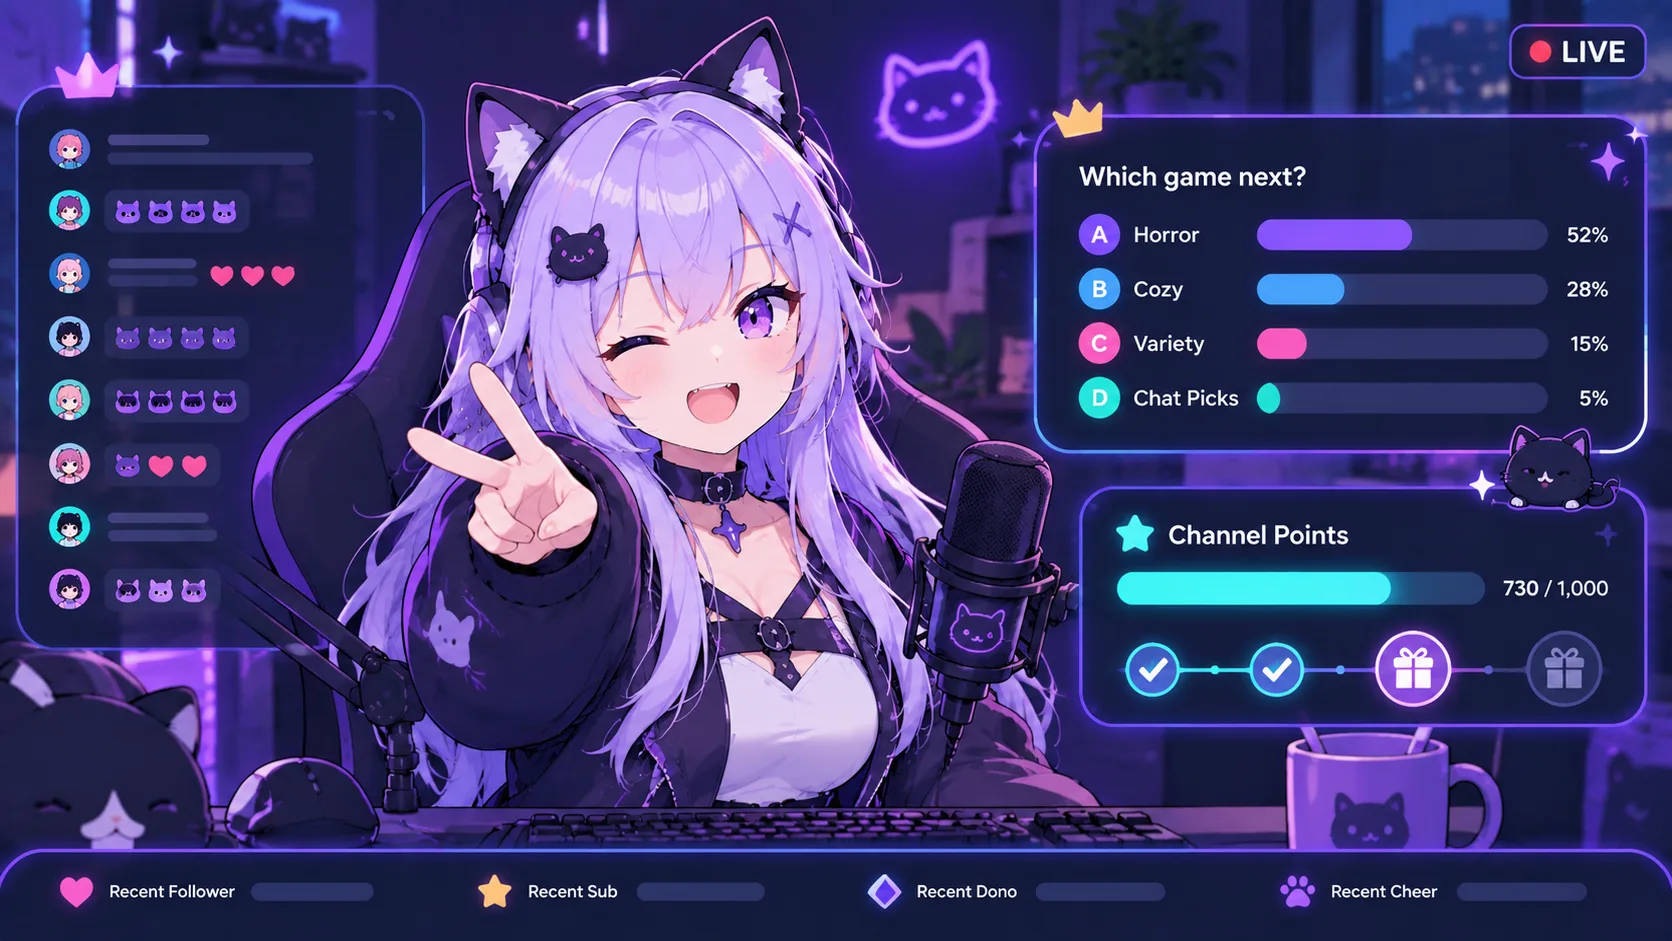
Beyond simple reactions, design a small trio: one vote, one redeem (channel points → short animation/prop with cooldown), one hand-performed moment you never automate. Too much automation turns you into a vending machine; too little leaves chat with no lever.
Rehearse offline 15 minutes (open vote → resolve → redeem once → hand beat). Prefab OBS sources. Separate game/Discord audio from mic—echo is usually double monitoring. Keep BRB ready if a gag swap stalls.
Community and brand
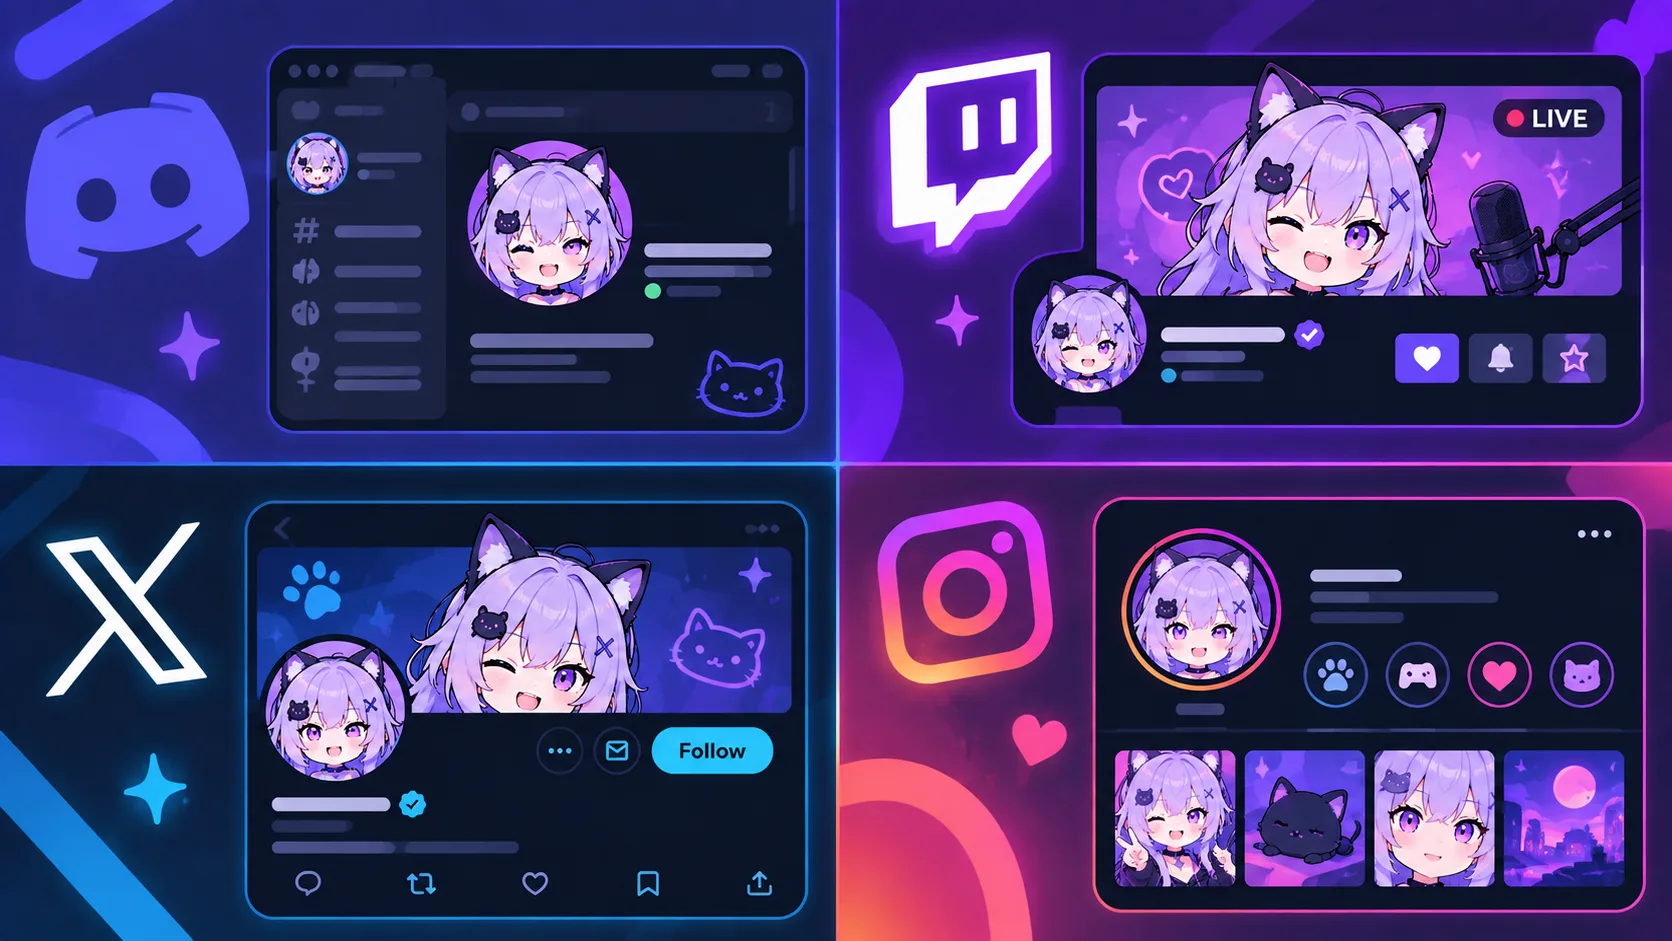
Open Discord early—even with five people (welcome, rules, one hangout). Early members become the culture later members inherit.
One-page brand sheet: three tone words, visual rules (2–3 hex + fonts from your overlay), lore level (how in-character), chat norms, and a never-say list of three lines. Pin the never-say list where you see it before stream.
A simple calendar (one theme per weekday you can keep) cuts decision fatigue and feeds the growth loop. Indie vs agency leverage is separate—see agencies vs indie when that choice actually appears.
Read the VTuber glossary so you do not mix up Live2D, rigging, and tracking when you brief an artist. Keep what a VTuber is in mind when you write your about page: viewers should understand the character in one screen. You do not need an agency to start; indie is the default path.
The creators who last are not the ones with the most expensive rig. They are the ones whose character is clear, whose audio is clean, and who still show up next week.